Neat Pulse MCP (beta): Setup Guide
Last updated June 16, 2026
Important Note: Neat Pulse MCP is currently in beta. Features and behaviour may change. For any feedback, please reach out to your Neat sales contact or reach out via developer@pulse.neat.no or Neat Support.
Overview
Neat Pulse MCP (@neat-no/pulse-mcp@beta) is a Model Context Protocol (MCP) server that connects AI assistants such as Claude or Cursor to Neat Pulse. It’s built for IT administrators and powers users who want to manage their Neat devices in plain language — no code, no API calls, no portal navigation. The server runs locally on your machine and relays your requests to the Neat Pulse cloud API, authenticating with your API token.
Once connected, you can ask your assistant to:
- List and inspect devices — connection and call status, firmware, network configuration, and sensor readings.
- Reboot a device (and any paired devices) remotely.
- List, create, update, and delete rooms.
- Browse locations and regions, and reset room enrolment codes.
For the full tool list and how the Neat Pulse hierarchy fits together, see Neat Pulse MCP (beta): Data Model and Tool Reference.
Contents
- Overview
- How to Works
- Prerequisites
- Instructions:
- Keeping your Token Secure
- Troubleshooting
- Final Notes
How to Works
The Neat Pulse MCP offers two kinds of capabilities to your AI assistant:
Tools — actions and queries your assistant can invoke: listing devices, rebooting hardware, managing rooms, and so on. All 12 tools are covered in the tool reference sections here.
Resources — reference documents your assistant can read on demand. Reading a resource changes nothing in your organisation; it simply helps the assistant inform itself. The server exposes a single resource:
| Resource URI | Contents |
|---|---|
pulse://domain-guide | Data model, ID formats, naming conventions, and key relationships — the Neat Pulse domain in a single reference |
Assistants that support MCP resources can read pulse://domain-guide on their own to orient themselves before using the tools. If your assistant ever seems unsure about the data model, you can prompt it directly: “Read the domain guide.”
To reach your devices, the server runs locally on your machine, in the middle of the path between your assistant and the Neat Pulse cloud:
| Step | Component | Where it runs | Connects to |
|---|---|---|---|
| 1 | Your AI assistant | Claude, Cursor, etc. | Neat Pulse MCP server |
| 2 | Neat Pulse MCP server | Locally, via npx | Neat Pulse API |
| 3 | Neat Pulse API | Cloud | Neat Pulse services |
A request like ‘list all offline devices’ is routed to the matching tool on your local MCP server. The server authenticates with your Neat Pulse API token, retrieves the data, and returns the results to your assistant, which presents them in plain language.
Prerequisites
The following conditions must be met to successfully connect an AI assistant to Neat Pulse:
- An active, paid Neat Pulse account.
- Owner access to your Neat Pulse tenant – only Owners can generate API tokens.
- Node.js v18 or later installed on your machine (Download Here).
- A local MCP host — such as Claude Code, Claude Desktop, Cursor, or Gemini CLI — installed on the same machine.
Caution: keep your API token secret. Your Neat Pulse API token grants access to your organisation within the scopes you assign it. Treat it like a password: never commit it to version control, and never paste it into a conversation with an AI assistant. If it is ever compromised, revoke it immediately in Neat Pulse under Settings → API keys and generate a new one.
Instructions:
1. Generate a Pulse API token
- Sign in to the Neat Pulse portal
- Go to Settings → API Tokens
- Click Create API Key and provide a descriptive name (e.g.
claude-mcp) - Assign the appropriate scopes (see below)
- Copy the token — you won’t be able to see it again
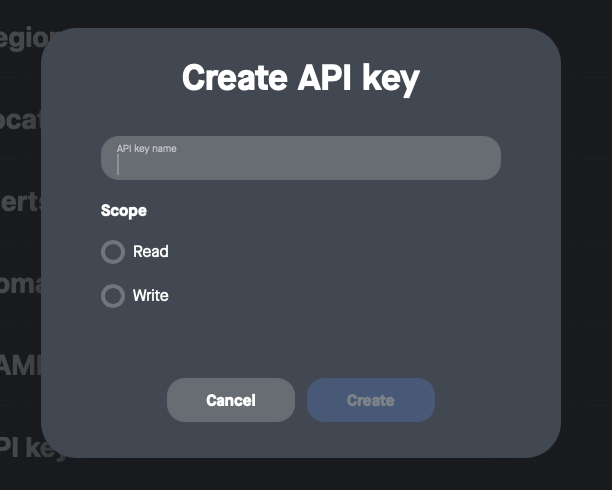
Choosing token scopes
- Read only — assign the
Readscope if you only need to query devices and rooms. The server will not be able to reboot, delete, create, or update anything. - Write — assign all available scopes if you want the complete set of 21 tools, including reboots, room management, and enrolment code resets.
Note: If in doubt, start with Read only access and expand later. A read-only token cannot cause accidental changes to your device fleet.
2. Find your organisation ID
Your organization ID (PULSE_ORG_ID) is a seven-character value visible in the Neat Pulse portal URL while you are logged in. Look for the number that appears directly after the domain:
https://pulse.neat.no/org/12345/...
                          ^^^^^
                          This is your org ID
Alternatively you can find your Organization ID in the top right hand corner when accessing Settings.

3. Setup an AI host
Add the Neat Pulse MCP server to your host using the instructions for your specific application below. In each case, replace your-api-token-here and your-org-id-here with the values from Steps 1 and 2.
3.1 Claude Code
If you use Claude Code (CLI, desktop app, or VS Code/JetBrains extension), run this command — no config file editing needed:
claude mcp add neat-pulse -s user -e PULSE_API_TOKEN=your-api-token-here -e PULSE_ORG_ID=your-org-id-here -- npx -y @neat-no/pulse-mcp@beta
Note: -s user makes the server available across all your projects. Omit it to limit it to the current project only.
3.2 Claude Desktop
Open your Claude Desktop configuration file (create it if it doesn’t exist):
- macOS:
~/Library/Application Support/Claude/claude_desktop_config.json - Windows:
%APPDATA%\\Claude\\claude_desktop_config.json
Add the neat-pulse entry to the mcpServers object:
{
  "mcpServers": {
    "neat-pulse": {
      "command": "npx",
      "args": ["-y", "@neat-no/pulse-mcp@beta"],
      "env": {
        "PULSE_API_TOKEN": "your-api-token-here",
        "PULSE_ORG_ID": "your-org-id-here"
      }
    }
  }
}
Restart Claude Desktop. The Neat Pulse tools will be available in your next conversation.
3.4 Cursor
Open ~/.cursor/mcp.json (create it if it doesn’t exist) and add:
{
  "mcpServers": {
    "neat-pulse": {
      "command": "npx",
      "args": ["-y", "@neat-no/pulse-mcp@beta"],
      "env": {
        "PULSE_API_TOKEN": "your-api-token-here",
        "PULSE_ORG_ID": "your-org-id-here"
      }
    }
  }
}
Restart Cursor to pick up the new configuration.
3.5 Gemini CLI
Open ~/.gemini/settings.json (create it if it doesn’t exist) and add the neat-pulse entry to the mcpServers object:
{
  "mcpServers": {
    "neat-pulse": {
      "command": "npx",
      "args": ["-y", "@neat-no/pulse-mcp@beta"],
      "env": {
        "PULSE_API_TOKEN": "your-api-token-here",
        "PULSE_ORG_ID": "your-org-id-here"
      },
      "timeout": 30000,
      "trust": false
    }
  }
}
Restart Gemini CLI to pick up the new configuration.
Important Note: Edit the JSON file directly rather than using the gemini mcp add command. The CLI command does not reliably handle the environment variable syntax this package requires, and may place credentials inside args instead of the env object — which will not work.
3.6 Other MCP-compatible clients
Any host that supports MCP can run the server directly. How you set the environment variables depends on your operating system. Please refer to your host’s documentation for how to register an MCP server.
macOS / Linux
PULSE_API_TOKEN=your-api-token-here PULSE_ORG_ID=your-org-id-here npx @neat-no/pulse-mcp@betaWindows (PowerShell)
$env:PULSE_API_TOKEN="your-api-token-here"; $env:PULSE_ORG_ID="your-org-id-here"; npx @neat-no/pulse-mcp@betaWindows (Command Prompt)
set PULSE_API_TOKEN=your-api-token-here && set PULSE_ORG_ID=your-org-id-here && npx @neat-no/pulse-mcp@beta4. Verify the connection
Once configured, start a conversation and type:
"List all devices in my Neat Pulse organisation."
If everything is set up correctly, your assistant will return a list of your Neat devices.
Keeping your Token Secure
Now that your token is in place, a few practices will keep it safe:
- Never commit your API token to version control. If you check your MCP config file into a repository, make sure the file is listed in
.gitignore. - Treat
PULSE_API_TOKENlike a password, and never paste it into a conversation with an AI assistant. If it is ever compromised, revoke it immediately in Neat Pulse under Settings → API keys and generate a new one. PULSE_ORG_IDis not a credential, but treat it with the same care as any internal identifier.- All access is scoped to your organisation — no cross-organisation data access is possible.
Troubleshooting
Some common issues could arise when using your MCP server, see below for some common errors and how to troubleshoot them:
| Symptom | Likely cause and fix |
|---|---|
| “Unauthorised” or “401” error | Your API token is invalid or has been revoked. Generate a new token (Step 1). |
| “Organisation not found” or “404” error | Your PULSE_ORG_ID is wrong. Re-check it in the Neat Pulse portal URL (Step 2). |
| “npx: command not found” | Node.js is not installed or not on your PATH. Install Node.js v18+ and restart your terminal or AI host. |
| No Neat Pulse tools appear | The server may not have started. Check that your config is valid (no trailing commas, matching braces) and that you restarted the host after saving. |
| The server starts but returns connection errors | The MCP server may be unable to download the @neat-no/pulse-mcp@beta package — common behind a corporate proxy or with npm registry restrictions. Run the npx command directly in a terminal to see the full error output. |
Final Notes
Now that you’re connected, your AI assistant can inspect device status and sensor readings, reboot hardware, move devices between rooms, and manage your full location and region hierarchy — all in plain language. If you started with a Read-only token and later need to make changes, return to Step 1, Settings → API keys and generate a token with the full set of scopes.
To learn everything your assistant can now do — and how the Neat Pulse hierarchy of regions, locations, rooms, and devices fits together — see Neat Pulse MCP: data model and tool reference.
Enjoy exploring what you can do with Neat Pulse and MCP!