Configuring SAML SSO for Neat Pulse
Last updated February 27, 2026
Introduction
To manage user access securely and at scale, Neat Pulse allows you to set up SAML-based
single sign-on. This article guides you through configuring SAML SSO on Neat Pulse and logging in.
Note: This feature is only available to customers on a paid Pulse plan.
Contents
- Introduction
- Overview
- Prerequisites
- Setup guide
- Logging in via SAML SSO
- User Attribute Statements
- Role-Based Access Control
- Troubleshooting
Overview
All Neat Pulse customers are able to configure email/password login and OAuth-based SSO via
Google or Microsoft Entra ID accounts. See here for information about Microsoft Azure AD / Entra ID federation.
Customers on a paid Pulse plan can also configure SAML 2.0-based SSO. Role based access
control can be configured per user from the Identity Provider used for the SAML SSO
integration.
Prerequisites
Setting up SAML SSO requires you to first verify your domain. For more info, see the article: How to Verify Your Domain for SAML SSO in Neat Pulse.
Note: Domain verification and and metadata URL verification can take up to 24 hours each.
Setup guide
Step 1. Create a new app or integration in your Identity Provider (IdP)
- This step is specific to the IdP that you use.
- If you use Okta, refer to this article for detailed instructions: Setting up SAML SSO using Okta.
- Create a new app or integration with SAML enabled in your IdP.
Step 2. Connect via SAML
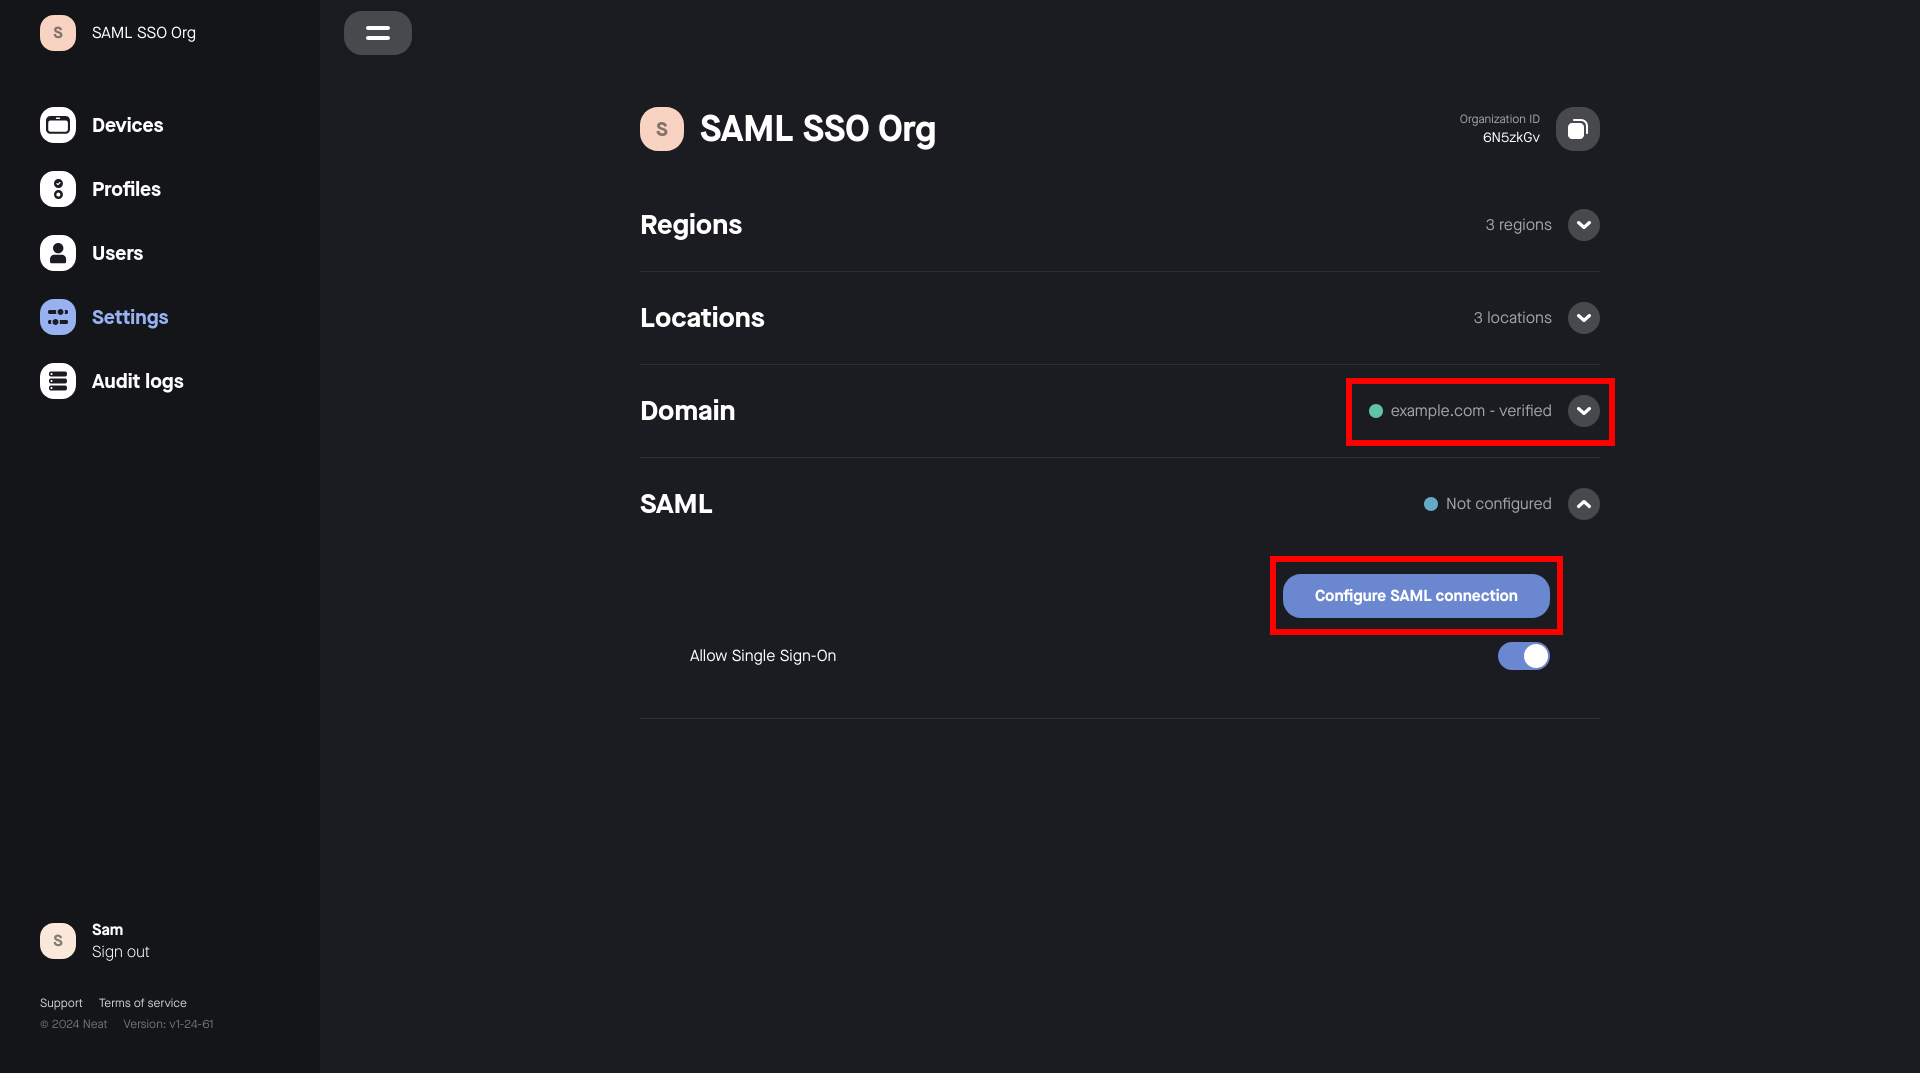
- Go to the Settings page as a Pulse user with the Owner role.
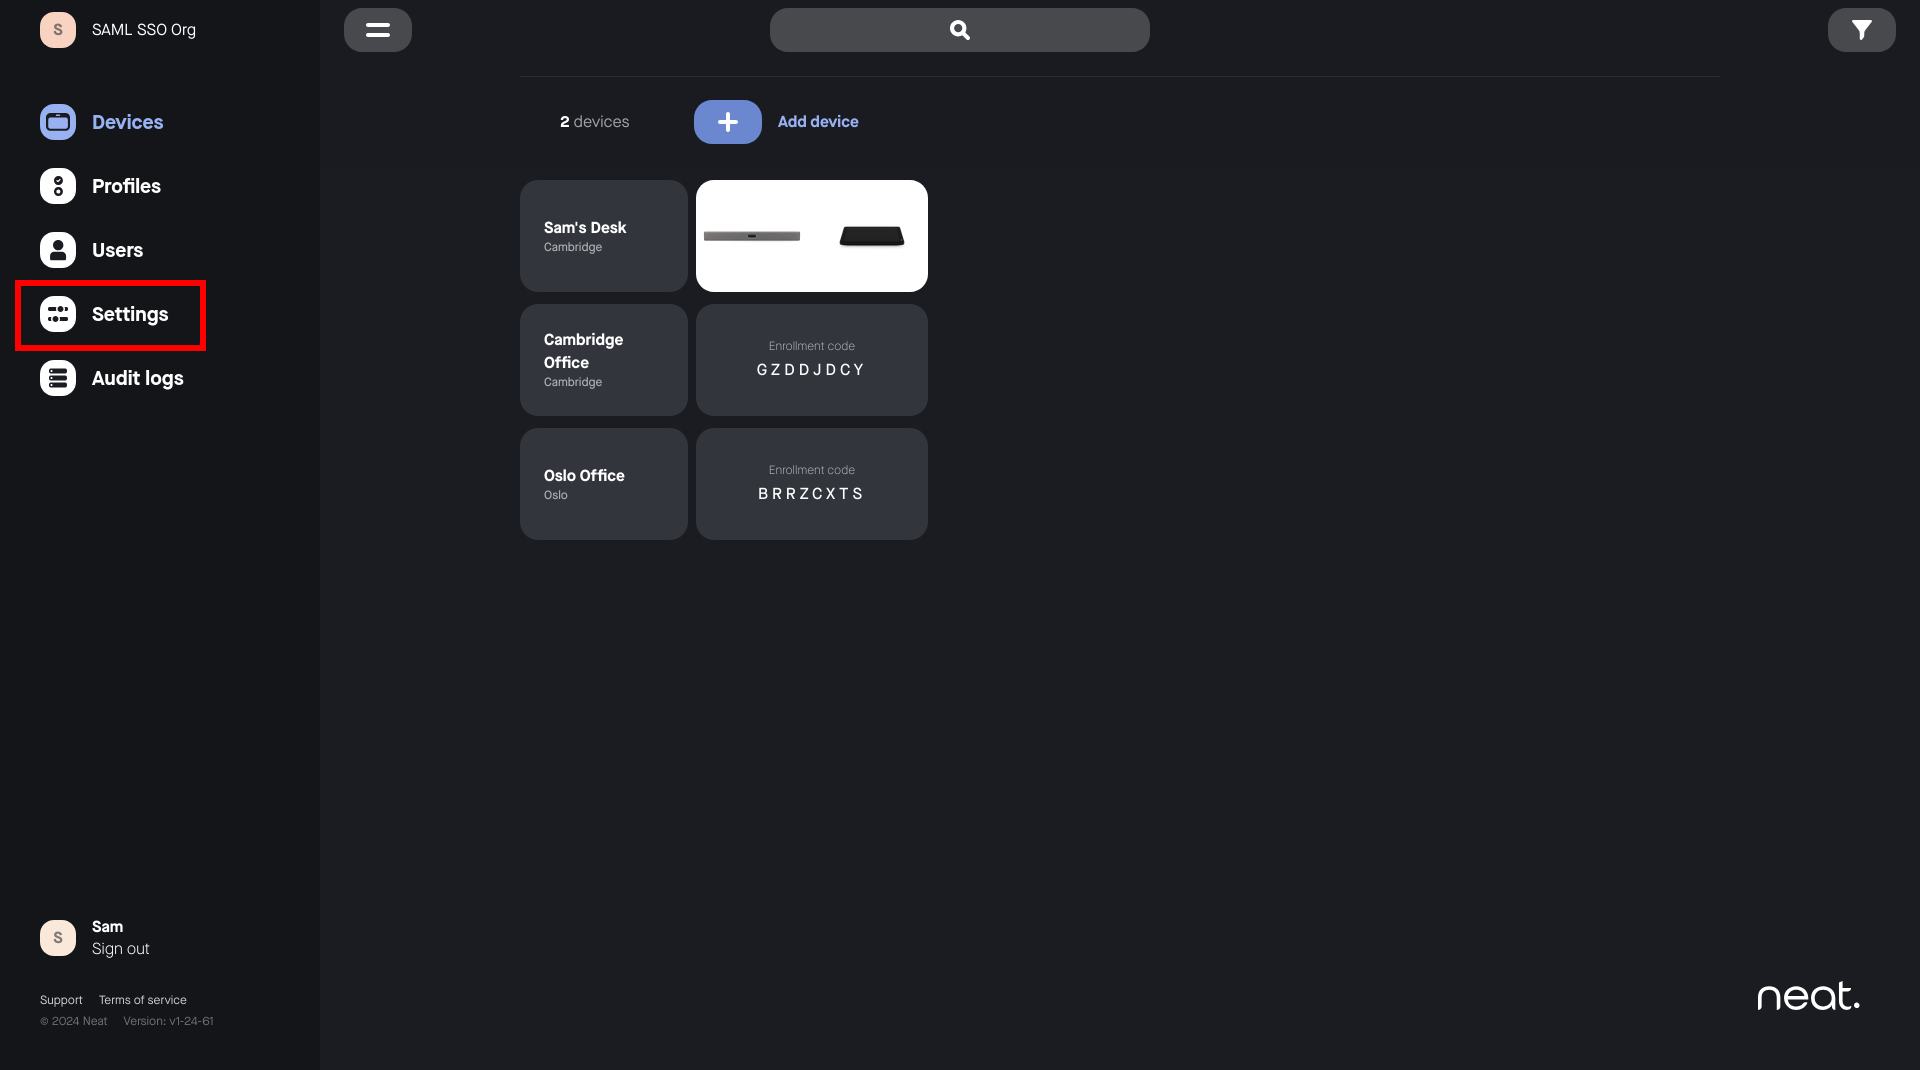
- Select Configure SAML connection.
Note: A domain must be verified. See the article: How to Verify Your Domain for SAML SSO in Neat Pulse.
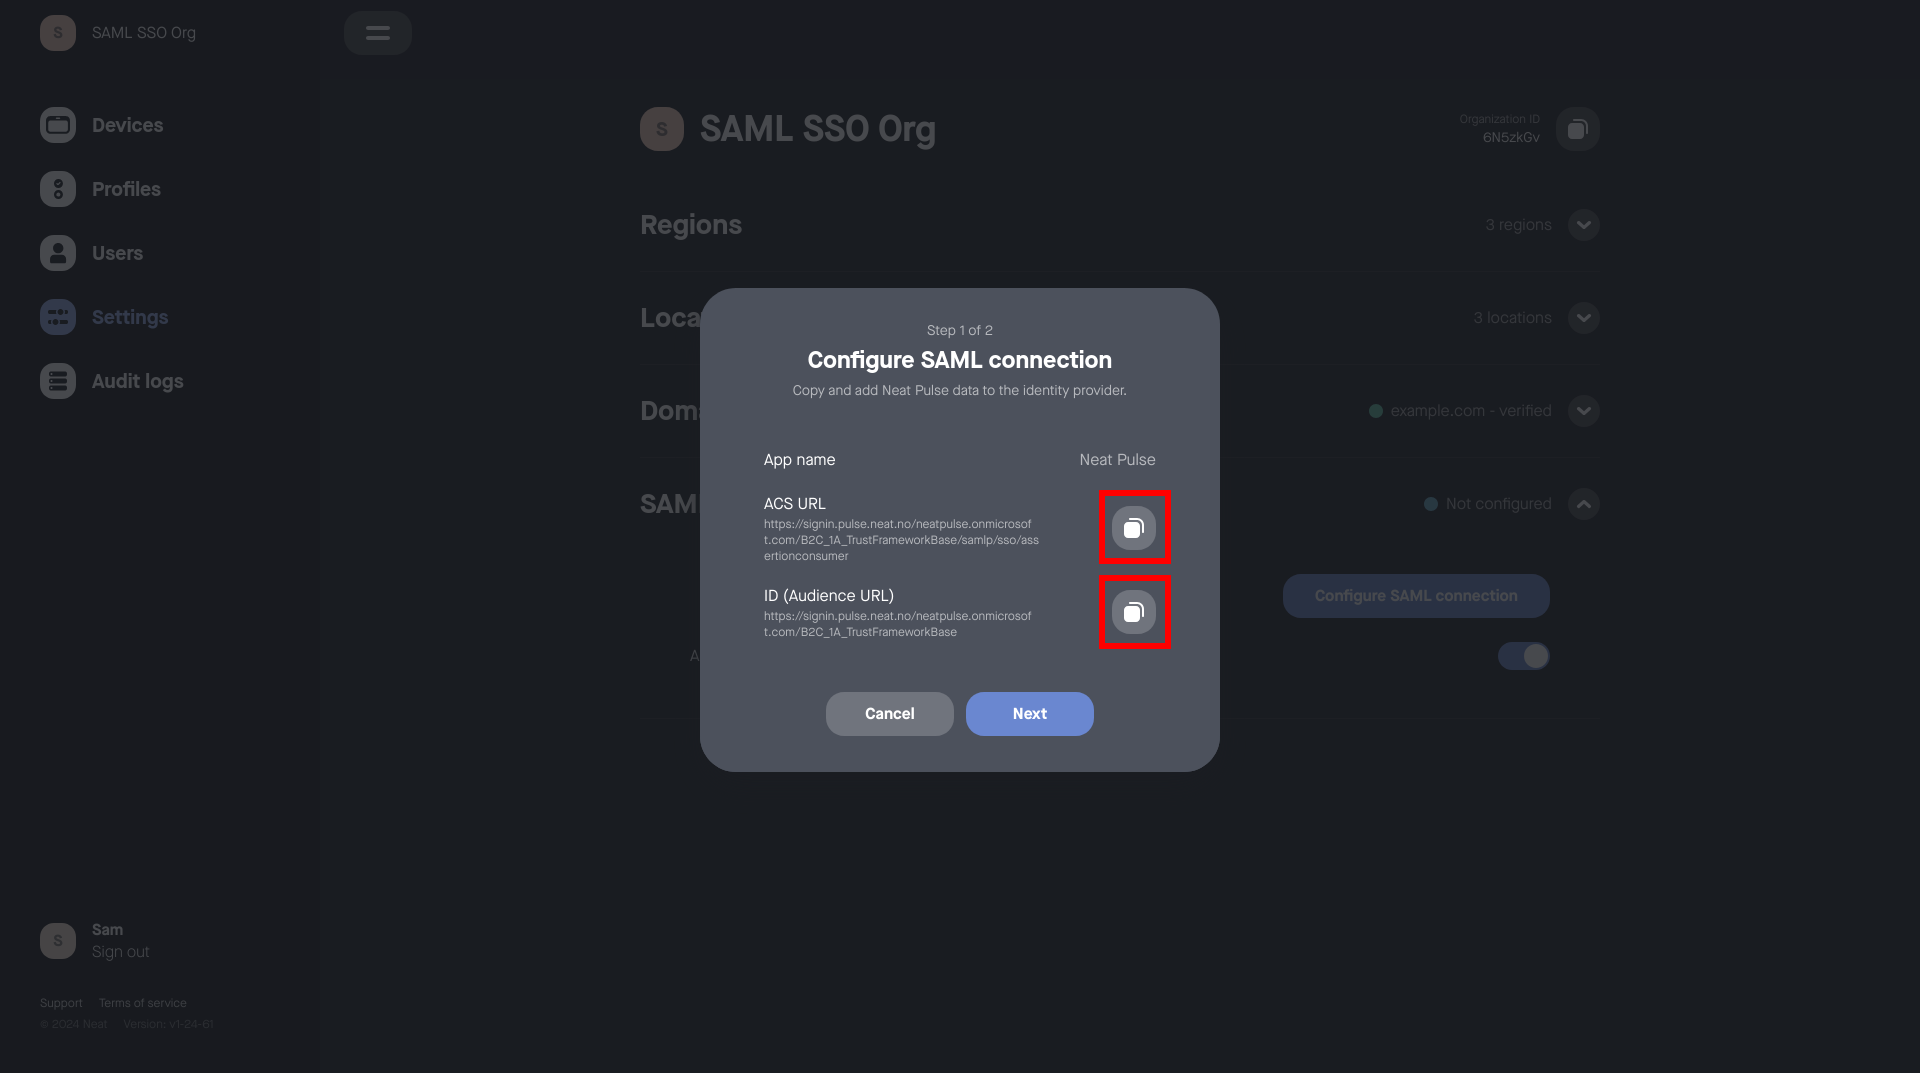
- Copy the provided ACS URL and Entity ID from the popup window in Neat Pulse
into your IdP.
- Copy the Metadata URL from your IdP into Neat Pulse.
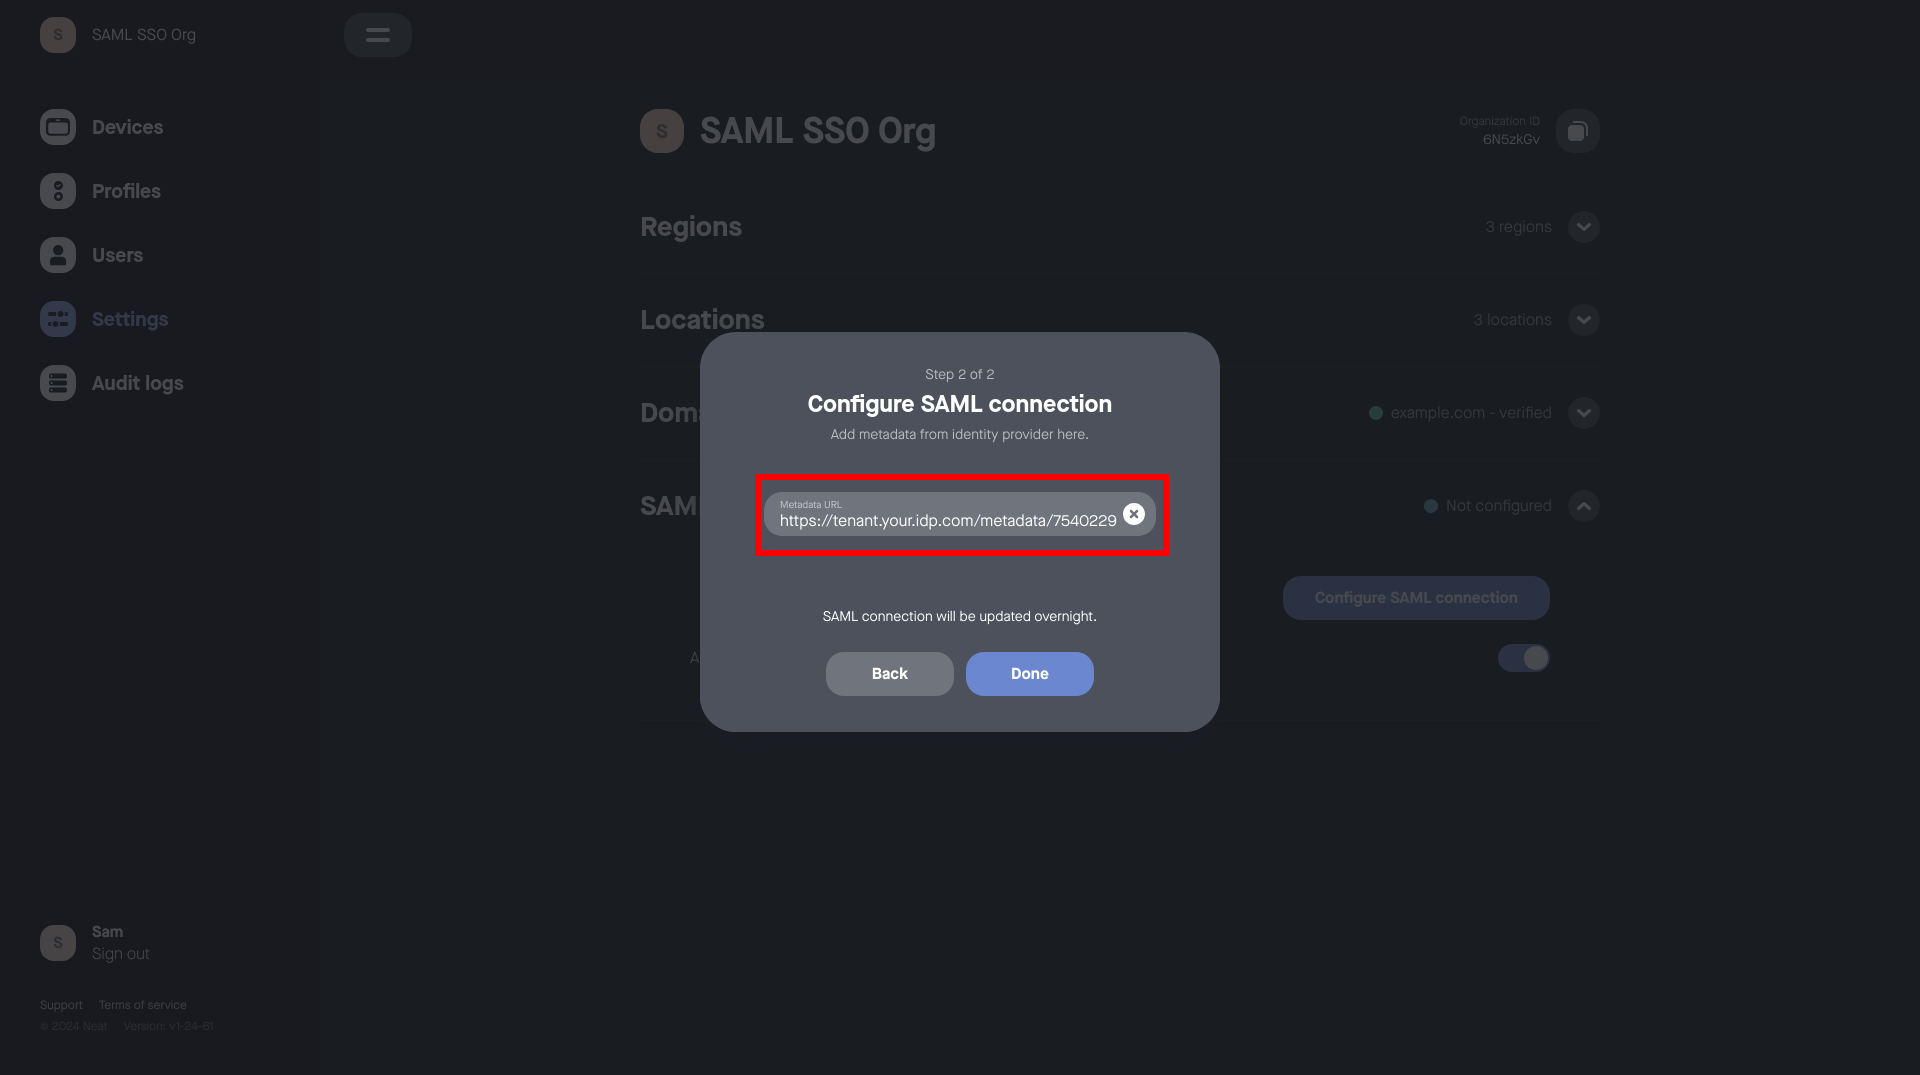
- Click Done.
- Wait for Neat Pulse to configure SAML SSO for your organization. (This will usually occur the following night in the GMT timezone.)
Step 3. Assign users and roles
Note: If the user already exists on Neat Pulse then this user will need to be deleted and then re-invited back to this Neat Pulse organization.
1. Click on the Neat Pulse invite.
2. From the sign-in page select SAML SSO.
3. Sign-in with username and password (Microsoft Azure/Entra).
- Assign the users that should be able to access Neat Pulse to the app in your
Identity Provider that was created for this integration earlier. - Users require Role-based Access Control (RBAC) roles to be assigned to them and passed through as SAML
attribute statements in order to control the permissions they have within
NeatPulse.
Note: If a user is assigned to the app/integration, but is not assigned any
RBAC roles, they will be unable to log in to Neat Pulse.
See the RBAC section below for more details and examples.
Step 4. Activation
- When your SAML SSO configuration is complete and activated, an indication will appear.

- You can now verify that your SAML SSO integration is working by attempting to log in. (Refer to the troubleshooting section below if you experience problems.)
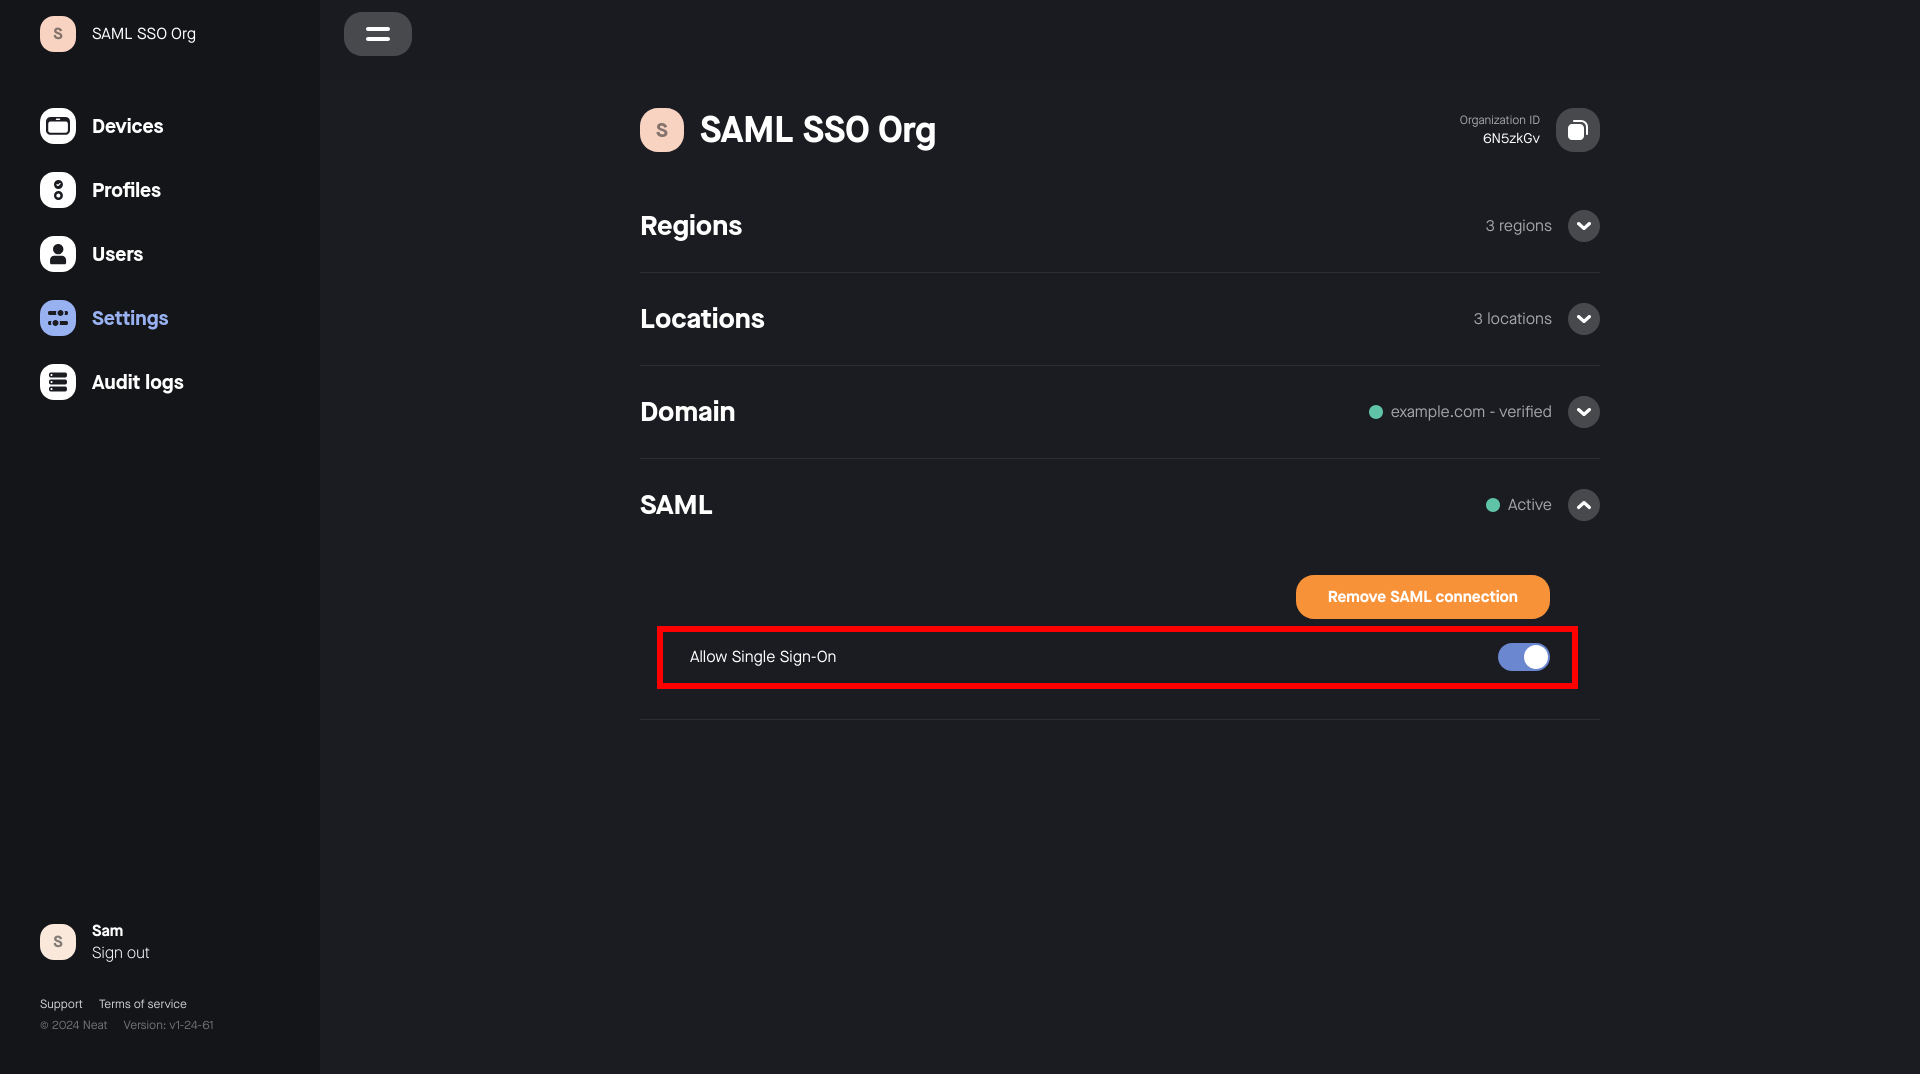
Step 5. Disabling SAML SSO
SAML SSO can be disabled by toggling the SAML SSO Enabled setting.
- This will immediately stop any Neat Pulse user in your organization who is
authenticated via SAML SSO from using the platform. - This can be used to temporarily disable your SAML SSO integration in
order to make changes, without needing to go through the login process
again.
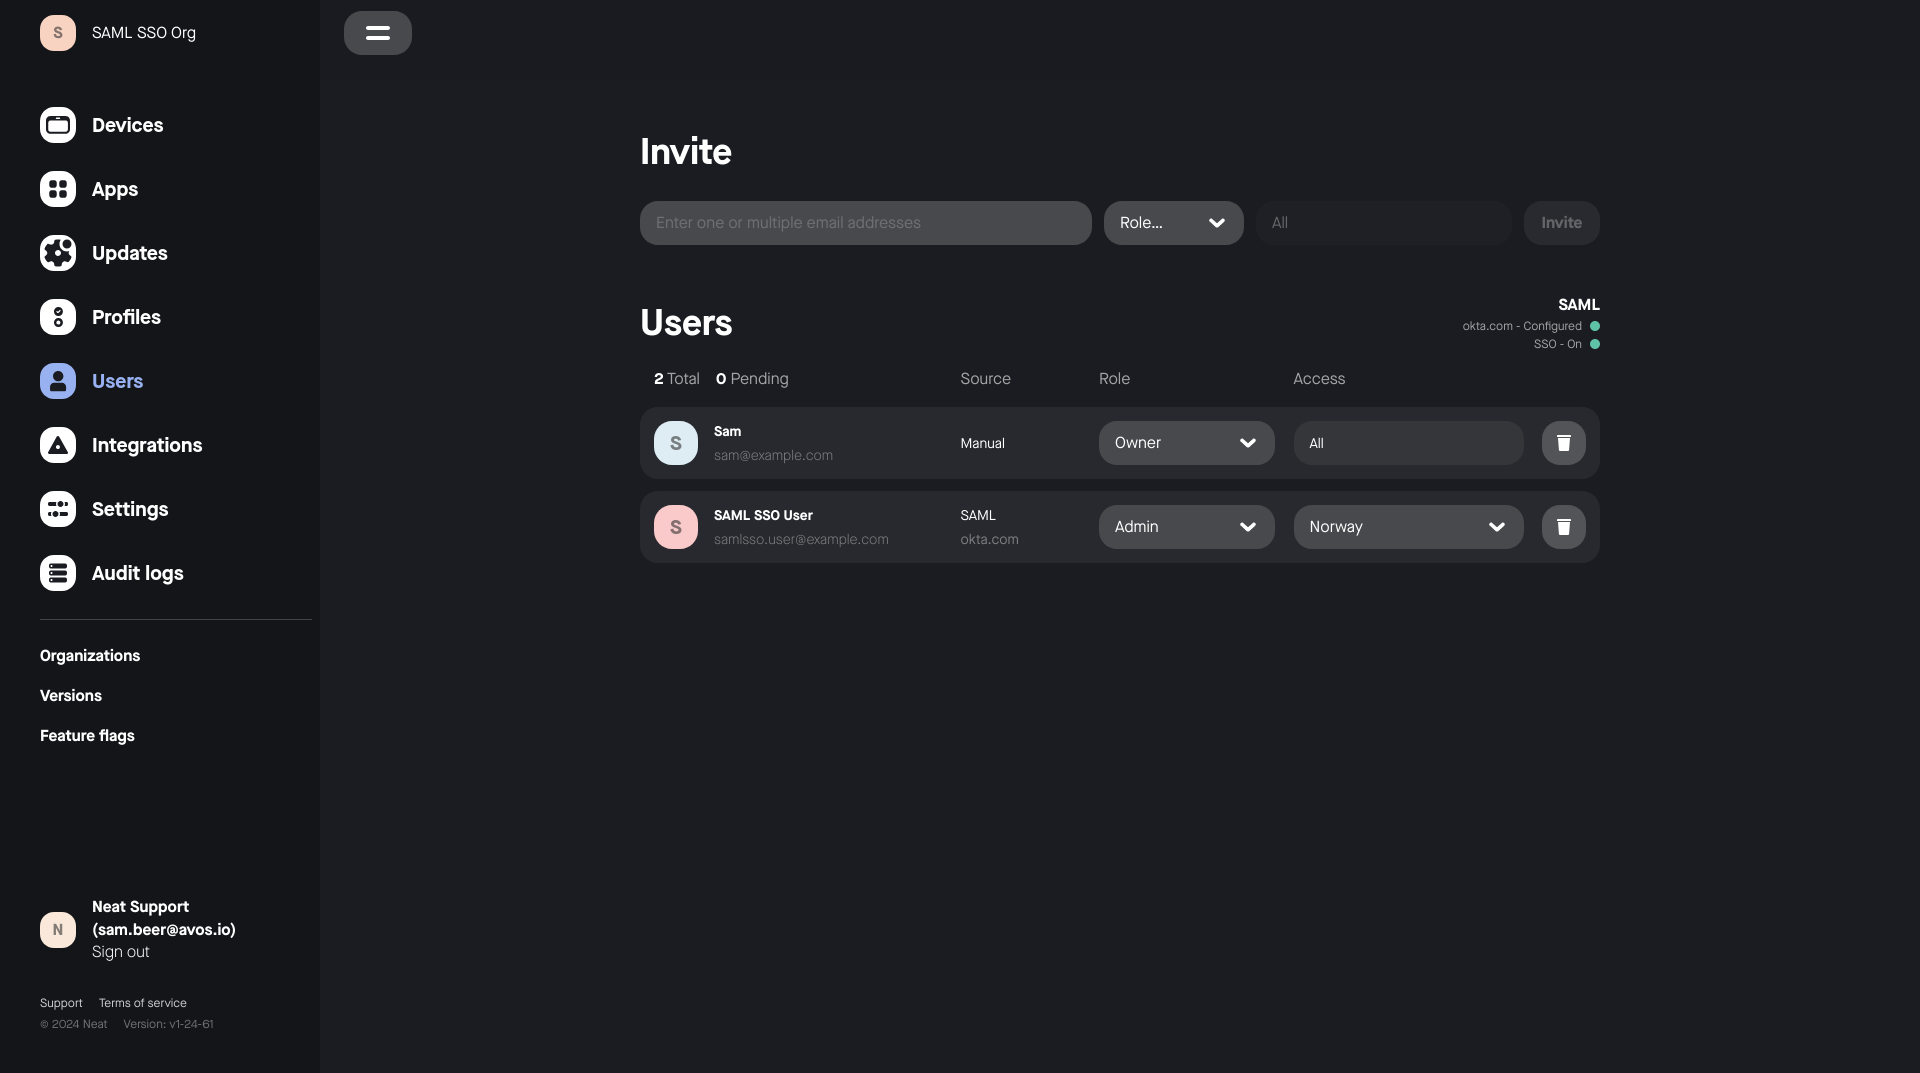
Step 6. Management
- An active SAML SSO configuration can be removed in the settings section,
allowing you to reconfigure a new connection. - A pending SAML SSO configuration can be reconfigured, allowing you to update
the metadata URL. - The Users page indicates the state of SAML SSO configuration for your Neat
Pulse organization.- Each user’s login method is also indicated here.
- If the SAML SSO enabled is turned off in the settings menu, SAML SSO
users will be unable to log in and will be greyed out in the users list.
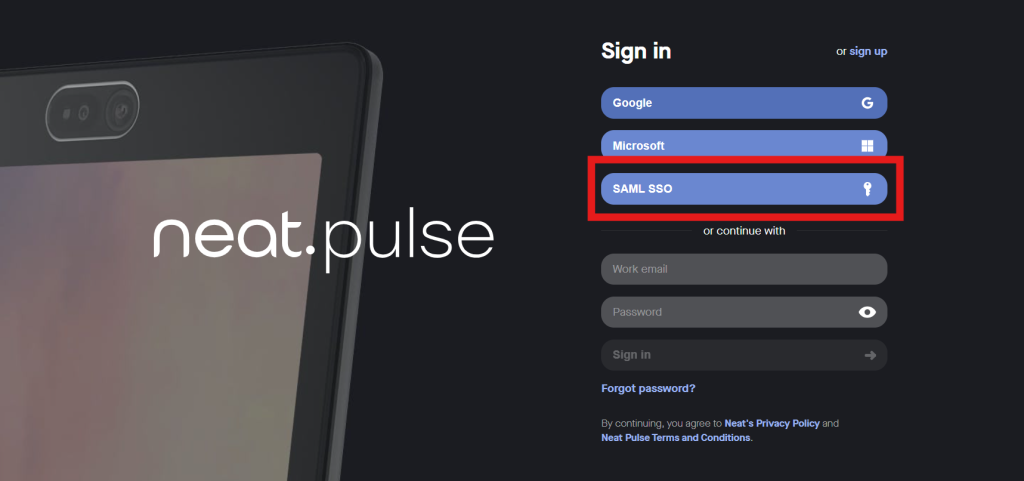
Logging in via SAML SSO
Step 1. Choose the SAML SSO method
- Go to the Neat Pulse login page
- Select Single Sign on (SSO)
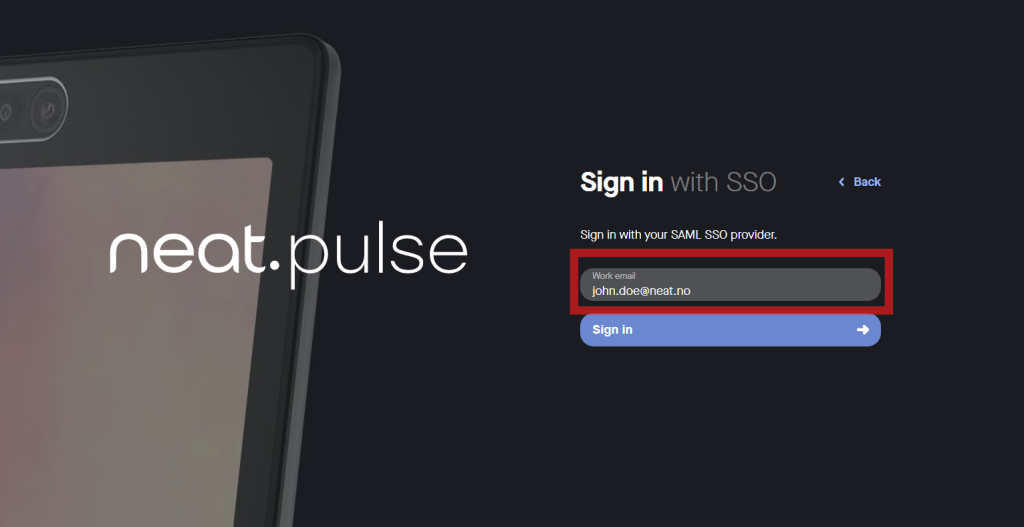
Step 2. Enter your email address
Your email address will need to match the domain that has been verified for your
Neat Pulse organization. For example, if example.com is your Neat Pulse organization’s verified domain, user@example.com is a compatible email address for SAML SSO.
Step 3. Sign in
- Click Continue. You will be redirected to your Identity Provider and prompted to
log in, unless you have an active session. - You now have access to Neat Pulse with the permissions assigned to you in your
IdP.
If the login process does not work, please see the troubleshooting section below.
User Attribute Statements
Pulse requires user details to be provided as Attribute Statements in the SAML Assertion
received from your Identity Provider. Some of these required user details are relevant to RBAC,
and a more complete description is given below in the Role-Based Access Control section.
| Claim Name | Value |
|---|---|
| displayName | Name of the user, as will be displayed in Neat Pulse |
| Email address of the user |
Role-Based Access Control
Refer to this section when specifying the Neat Pulse permissions for your users.
The two relevant RBAC attribute statements are shown in the table below.
| Claim Name | Value |
|---|---|
| neat_pulse_roles | PulseRoleOwner / PulseRoleRegionAdmin |
| neat_pulse_regions | PulseRegion{Name of region in Neat Pulse} |
Examples
Owner
To make a user an owner, they must have the neat_pulse_roles attribute present, and its
value must be PulseRoleOwner.
| Claim Name | Value |
|---|---|
| neat_pulse_roles | PulseRoleOwner |
Region Admin
To make a user a region admin, they must have the neat_pulse_roles attribute present, and
its value must be PulseRoleRegionAdmin.
| Claim Name | Value |
|---|---|
| neat_pulse_roles | PulseRoleRegionAdmin |
They must also have the neat_pulse_regions attribute present, with multiple attribute values. The attributes shown below would make the relevant user a region admin with permissions to manage rooms and devices within the UK and EMEA regions in Neat Pulse.
| Claim Name | Value |
|---|---|
| neat_pulse_regions | PulseRegionUK |
| neat_pulse_regions | PulseRegionUK, PulseRegionEMEA |
These values must be provided as multiple attribute values in the SAML assertion. Note that passing a single comma separated value is not supported.
Troubleshooting
No rooms or devices appearing after SAML SSO Sign on
This is likely the result of your new SAML SSO authenticated user having been created without
correct role and/or region assignments. Check in the users page if your user is an Admin
without any regions assigned. If your new user is an Admin without any regions assigned, they
will be unable to view any rooms or devices that are in existing regions.
Solution: Ensure that your IdP integration is configured such that the attribute statements (as
shown in the sections above) are being sent in the SAML Assertion.
Further troubleshooting
If you believe that the attribute statements are already correctly configured, you can verify their
presence in the SAML Assertion by using a SAML tracing tool, like these browser extensions:
Chrome:
https://chromewebstore.google.com/detail/saml-tracer/mpdajninpobndbfcldcmbpnnbhibjmch?hl=
en
Firefox: https://addons.mozilla.org/en-GB/firefox/addon/saml-tracer/
With a SAML tracing tool running, log in to Pulse via SAML SSO again.
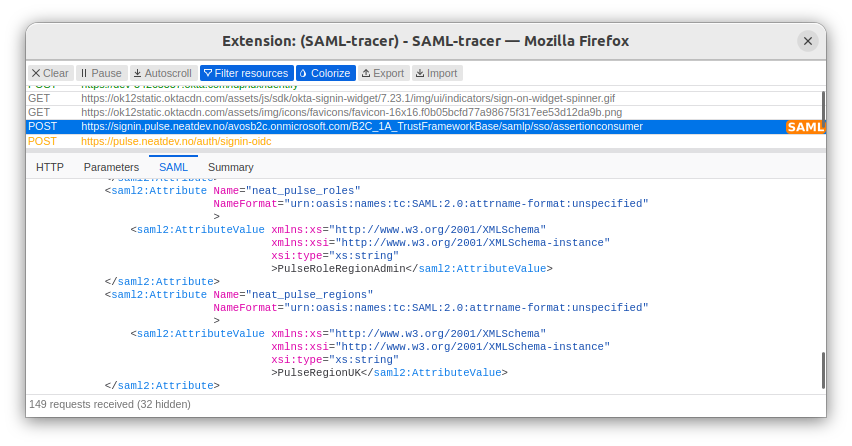
Two HTTP requests will be tagged as SAML – the Authentication Request and the Assertion
(response). Check your assertion for the presence of the neat_pulse_roles and
neat_pulse_regions attributes.
Error message on SAML SSO Sign on: “You are not a member of this
organization”
For Pulse versions below 1.27, this error can be encountered if an initially unsuccessful SAML
SSO login is followed by a successful one.
Solution: If you encounter this error message after successfully making it through your IdP’s
login page, please get in touch with Pulse support so that they can resolve the issue.