How to connect Neat Bar, Bar 2 and Bar Pro with a Neat Pad using Wi-Fi
Last updated on August 1, 2025
This article provides a step-by-step guide on how to connect a Neat Bar, Bar 2 or a Bar Pro with a Neat Pad to a Wi-Fi network and pair them together. For more information on Wi-Fi support, see the article Wi-Fi support on Neat devices.
Contents
Deployment architecture
For this setup to work, both Neat Pad and the Main room device (Bar, Bar 2 or Bar Pro) must be on Wi-Fi network.
Prerequisites
- Both Neat Bar/Bar2/Bar Pro and Neat Pad must be connected to the same subnet.
- All appropriate firewall ports need to be open, as described in the article Network and firewall requirements for Neat.
- If you are planning to change network settings of a pre-existing paired Neat Bar and Neat Pad, please make sure you factory-reset both and start the initial setup again.
How to configure
- Connect both Neat Bar/Bar 2/Bar Pro and Neat Pad to power sources and connect to an external display using HDMI 1 port (for a second monitor, use HDMI 2 port). If you want to connect Neat Bar/Bar 2/Bar Pro on Wi-Fi, do not connect the Ethernet cable to it. If you want to connect the Neat Pad over Wi-Fi, use the PoE injector to power it up, but do not connect it to a wired network.
- Follow the instructions on the Neat Pad, starting with the ‘preferred language’ selection. Click Continue.
- Choose the appropriate setup for Neat Bar/Bar2 or Bar Pro with a controller. Click Continue.
- Next, follow the mounting guides for the appropriate configuration for your room and press Start guide (optionally, you can choose Skip if you are already aware of how to mount the devices.
- If you are connecting the Neat Pad to a Wi-Fi network, you will see the following screen:
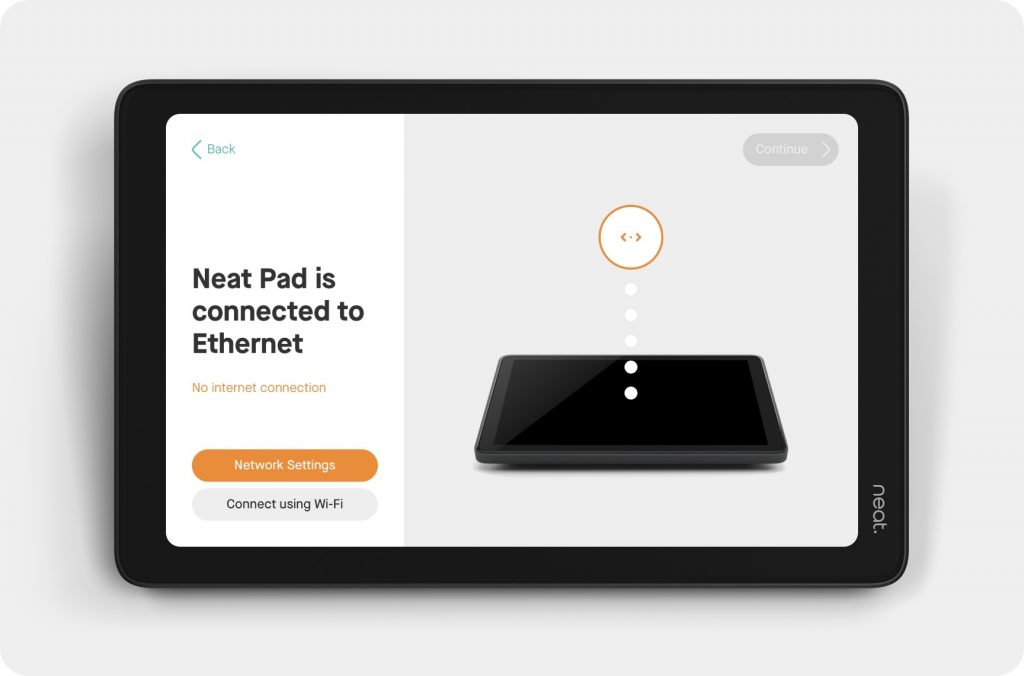
- Choose Connect using Wi-Fi. You will see the ‘Neat Pad Wi-Fi’ screen. Please note that for successful pairing, Neat Bar/Bar2/Bar Pro and Neat Pad need to be on the same ‘subnet’.
- Next the Neat Pad populates a list of all Wi-Fi networks available to connect.
- Select your Wi-Fi network, enter the password and click Join. Once connected, you will see a ‘tick’ next to the Wi-Fi network’s name (SSID). Click Continue.
- Select the time zone and click Continue.
- Next you will see the list of available devices. Choose the serial number that is shown on the TV screen of your Neat Bar/Bar2/Bar Pro and click Continue.
- You will see the pairing process start and after a short period, the pairing should be successful. You will get a ‘Paired with Neat Bar or Bar Pro’ message on the Neat Pad, and a corresponding ‘Paired with Neat Pad’ on your TV screen. Click Continue.
- Choose between Zoom Rooms or Microsoft Teams (or any other available options) as your platform and click Continue.
- You’re now all set! Your chosen platform will begin launching.
IMPORTANT NOTE: Wi-Fi networks can be more susceptible to varying signal strengths and disruptions and therefore impact real-time audio/video data. For high quality, reliable video conferencing experience, we strongly recommend using Ethernet networks rather than wireless networks, wherever possible.