How to Install Google Meet on Neat Devices
Last updated January 27, 2026
This article gives information on how install Google Meet on Neat devices.
Contents
- Supported devices
- Prerequisites
- 1. Pulse account preconfiguration
- 2. Out-of-the-box (OOB) configuration
- 3. Enroll your device in Neat Pulse (mandatory)
- 4. Selecting the Google Meet application
Supported devices
Only the following Neat Gen 2 devices officially support Google Meet:
- Neat Pad
- Neat Bar Gen 2
- Neat Bar Pro
- Neat Center
Important note: On the first release of Google Meet, only the devices above are certified. Google Meet will be coming soon to Neat Board 50, Neat Board Pro, and Neat Board 32.
Prerequisites
- Neat devices require a minimum of Neat OS 25.4.2 on Android 13. (See Software Updates for release information. For new deployments and while 25.4.2 is on Preview, see the following: Important Notice for Google Meet Deployment)
- You must have Owner access to a Neat Pulse* account in order to install Google Meet on the devices.
- Ensure that the Network and Firewall requirements for Neat Devices, Neat Pulse, and Google Meet software have been met: Network and Firewall Requirements
*Note: This is an initial requirement at GA.
1. Pulse account preconfiguration
- Open pulse.neat.no and sign in as the Owner of the Neat Pulse account. For more information on how to sign in, see Sign in to Neat Pulse.
- Go to Apps on the left-hand side menu, and toggle on Google Meet as an application available for your Organization.

- Go to Devices on the left-hand side menu.
- If you already have a named space created in Neat Pulse that you wish to add your Neat device to, simply open that space and click Generate Code.
- If you want to create a new named space in Neat Pulse or find out more information on enrolling devices to Neat Pulse, see the article How to Enroll a Device in Neat Pulse.
Keep a note of the generated code as you will need this in step 3 to enroll your device in Neat Pulse.
2. Out-of-the-box (OOB) configuration
Follow the instructions to set up your specific Neat device by selecting the appropriate article from How to Set Up a Neat Device, and come back to this article when you reach the step of enrolling your device in Neat Pulse.
3. Enroll your device in Neat Pulse (mandatory)
Once you reach the screen that gives the option to enroll your device in Neat Pulse, follow the instructions below:
Important Note: You can only use your device to access Google Meet after you have enrolled your device on Neat Pulse.
- Enter the generated code (created in step 1) on the Neat Pad screen (see figure 2).
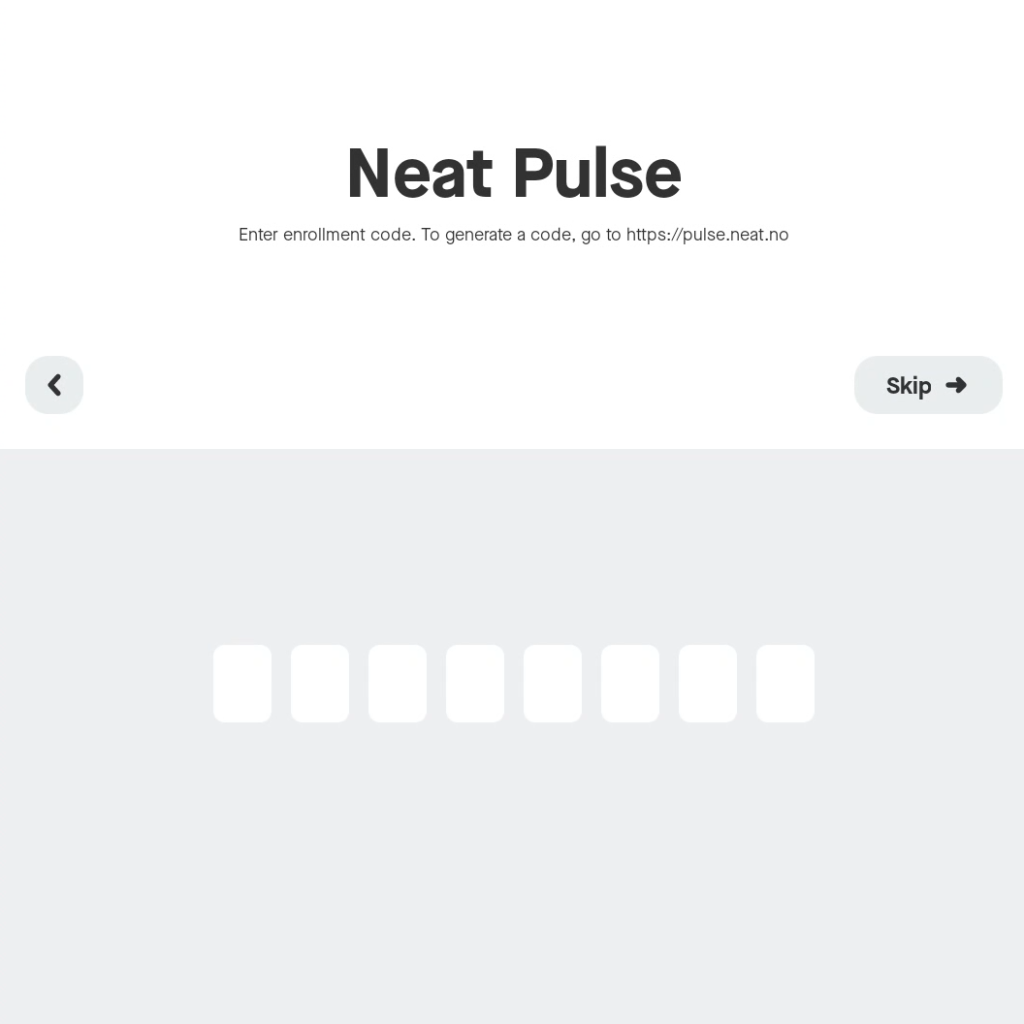
- The screen will show a progress bar to confirm that the devices are being enrolled in Neat Pulse. Do not unplug your devices during this process.
- Once completed, the Neat Pad screen will show that the devices have been added to Neat Pulse.
- If you view Neat Pulse, you will now see your newly added device in the designated named space.
- Click Continue.
4. Selecting the Google Meet application
Once your devices are successfully enrolled in Neat Pulse, press Continue until you encounter the Choose platform page, where you will see Google Meet as an application.
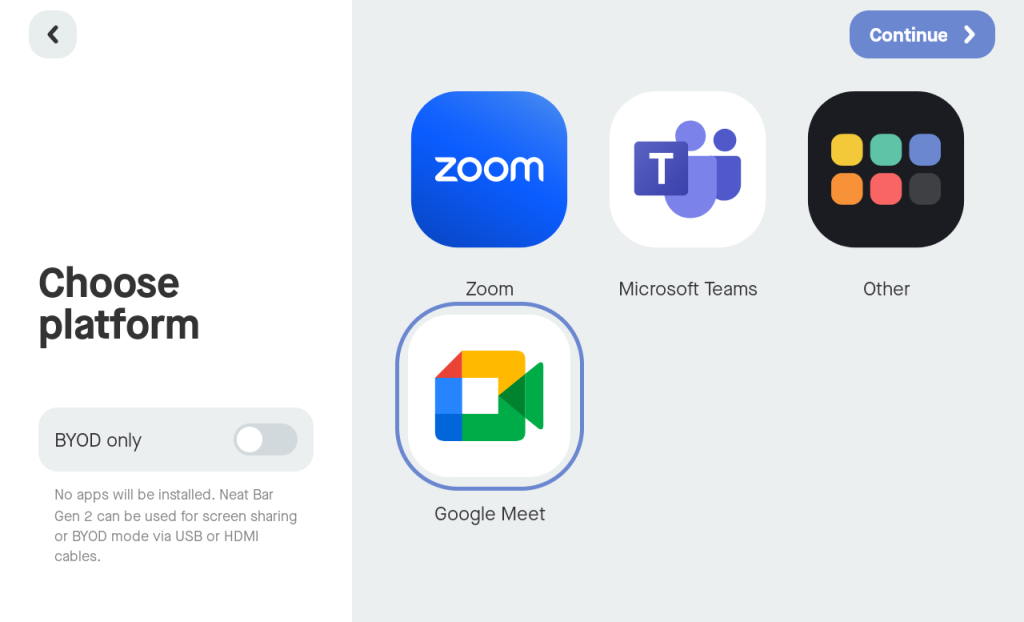
Select this application and press Continue to install Google Meet as your preferred video conferencing platform.
You are now ready to pair and sign in on Google Meet. For more information, see How to Pair and Sign in on Google Meet.