How to Set Up Neat Frame
Last updated on November 20, 2025
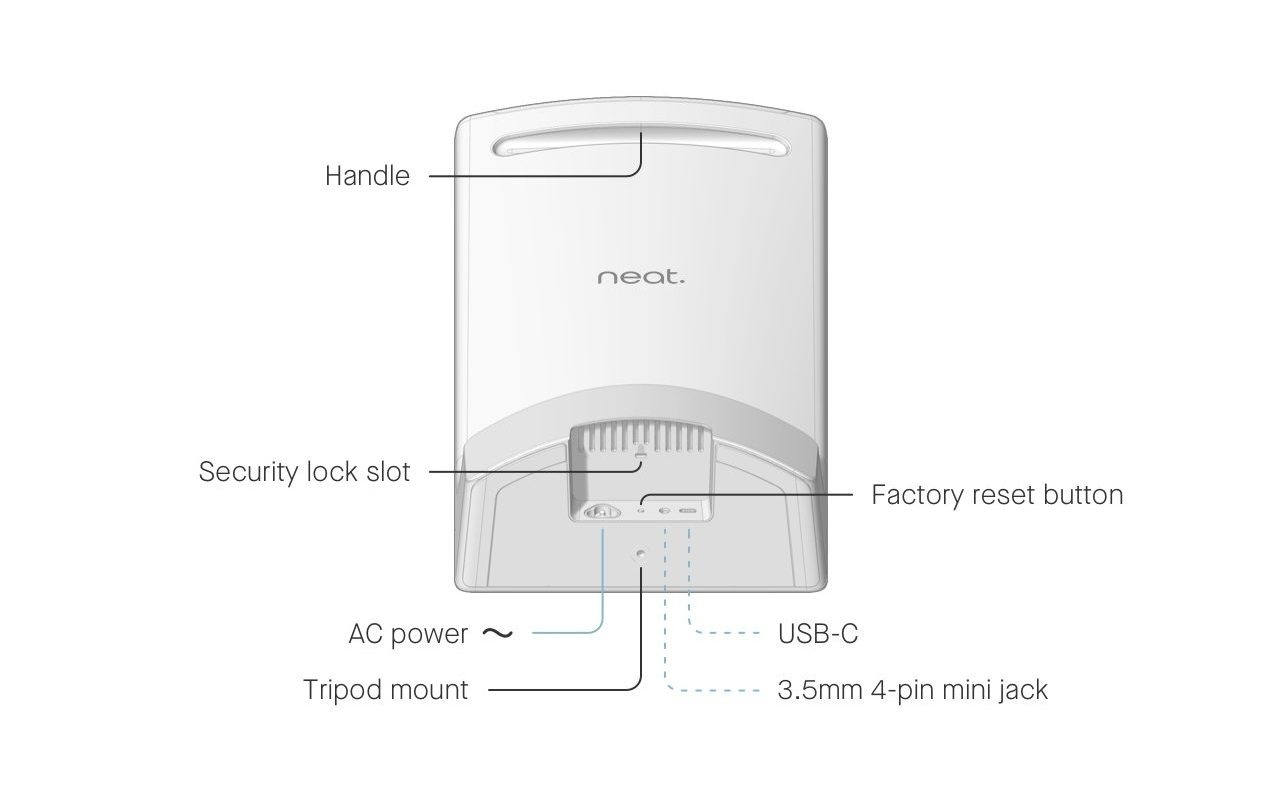
Neat Frame offers a full HD portrait multi-touchscreen and easy-to-hold handle freeing up monitor space and processing power with a revolutionary meeting experience anywhere in your home or office.
In this article, you will find simple step-by-step instructions on how to set up your Neat Frame (brand new out-of-box or after a factory reset).
Contents
- Prerequisites
- What’s Included
- 1. Power up your Neat Frame
- 2. Configure language, network, and time zone settings
- 3. Enroll your Frame on Neat Pulse (optional)
- 4. Share device analytics with Neat
- 5. Camera preview
- 6. Framing boundary (optional)
- 7. Choose video conferencing platform or App Hub
Prerequisites
The Neat Frame must meet the following network requirements in order to successfully connect to the internet Network and Firewall requirements for Neat devices.
What’s Included
- Neat Frame
- Power Cable (9.8 feet/3 meters)
1. Power up your Neat Frame
Connect your Neat Frame to AC power.
2. Configure language, network, and time zone settings
Once the Frame powers on, the user interface takes you through the following steps:
- Select a language and click Continue.
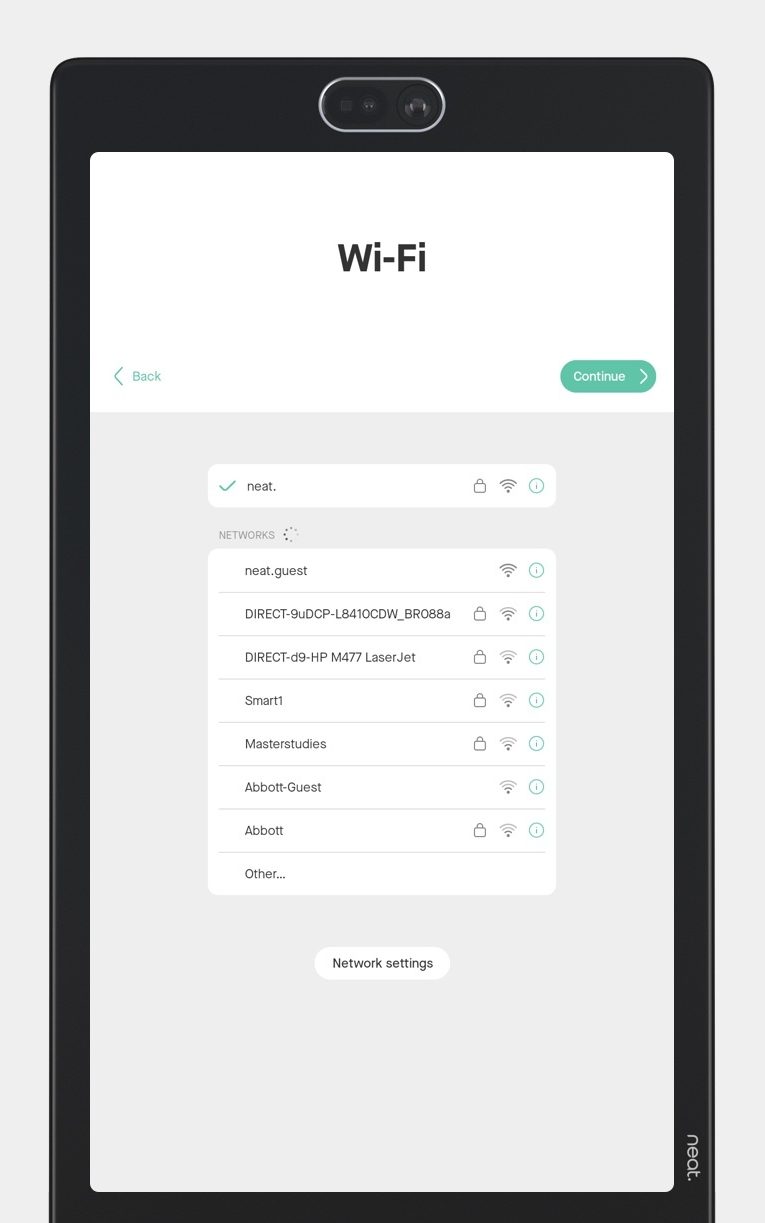
- Connect the Frame to Wi-Fi (see Figure 1) by selecting your preferred network. Once the network connection is established, click Continue.
(If you want to use an Ethernet connection instead, you can connect Frame to your network using an Ethernet -> USB-C adaptor.) - Select a time zone to use on your device and click Continue.
- You then have the option to select a 24-hour clock on the Time page. Click Continue.
3. Enroll your Frame on Neat Pulse (optional)
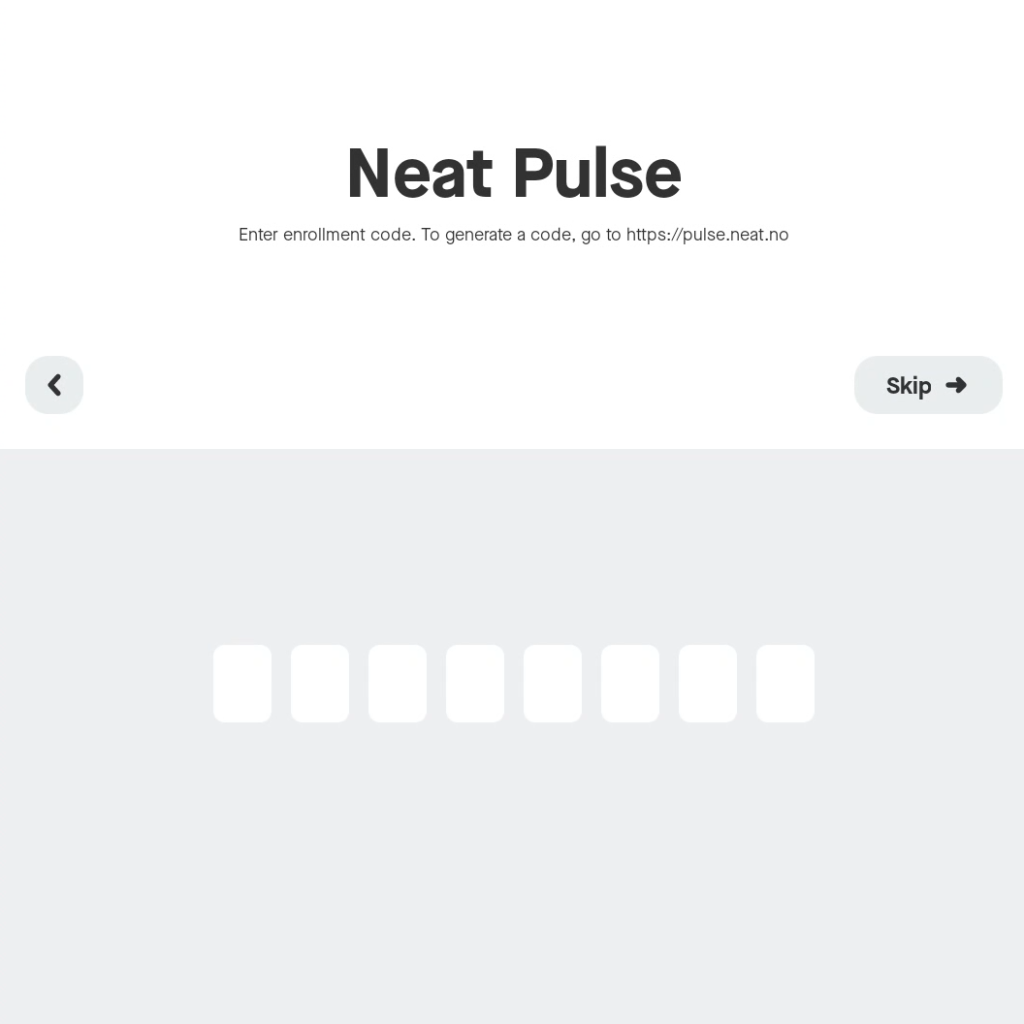
The next screen gives you the option to enroll your device on Neat Pulse. If you don’t wish to enroll your device at this point, click Skip. Otherwise follow these steps.
Important Note: You can only use your device to access apps on Neat App Hub after you have enrolled your device on Neat Pulse.
- Go to https://pulse.neat.no/ and login.
- If you already have a named space created in Pulse that you wish to add your Neat device to, simply open that space and click Generate Code.
If you want to create a new named space in Neat Pulse or find out more information on enrolling devices to Pulse, see the article How to Enroll a Device in Neat Pulse. - Enter the generated code on the Neat device screen (see Figure 2).
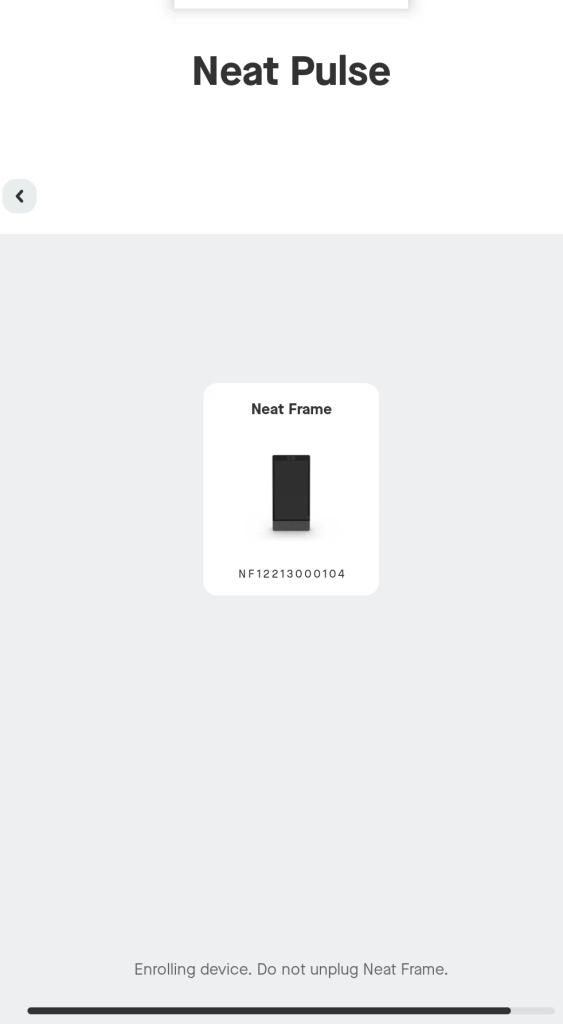
- The screen will show a progress bar to confirm that it is enrolling the device on Neat Pulse. Do not unplug your device during this process (Figure 3).
- Once completed, the device screen will show that it has been added to Neat Pulse (Figure 4).
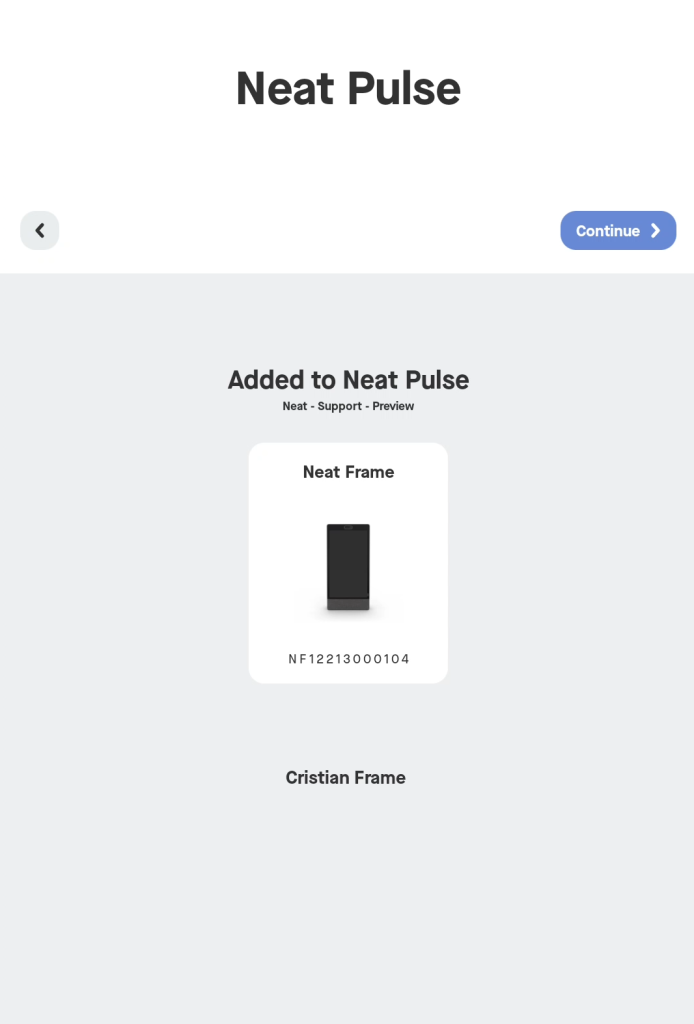
- If you view Neat Pulse you will now see your newly added device in the designated named space.
- Click Continue.
Note: If you skipped this step and wish to enroll your device on Neat Pulse at a later date, simply go to Settings > General > System settings > Add to Neat Pulse on your device interface and follow the steps above.
4. Share device analytics with Neat
The next page is for Analytics and Improvements. You have the option to enable or disable sharing device analytics with Neat using the toggle button. Click Continue.
5. Camera preview
The next page allows you to see how you are always framed on the device. Click Looks good.
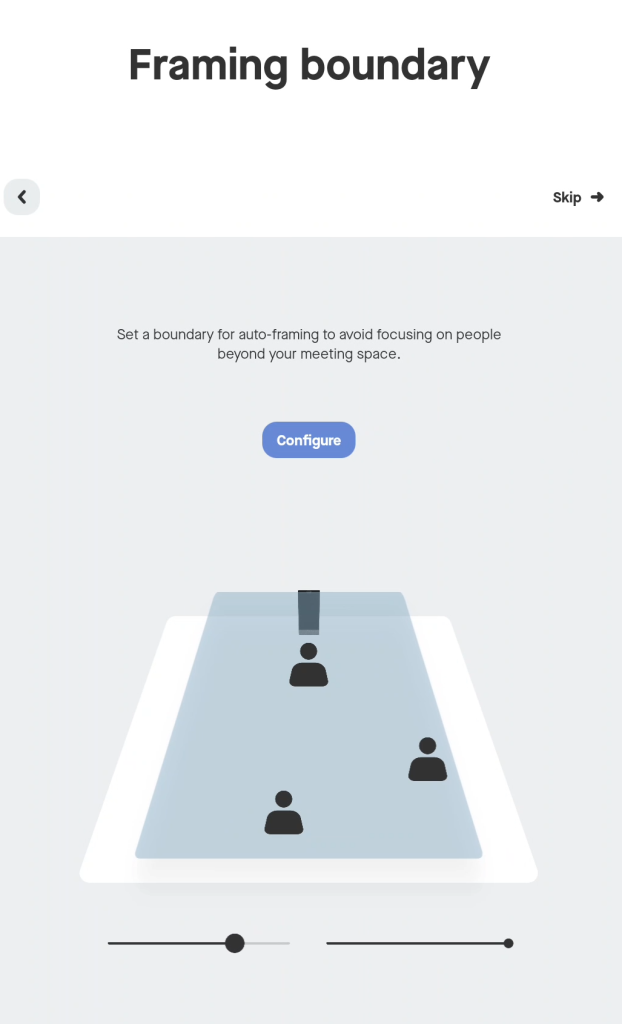
6. Framing boundary (optional)
This page allows you to set a boundary for auto-framing to avoid focusing on people beyond your meeting space. If you wish to set this up now, click Configure (Figure 5) and adjust the width and depth fields to your preference, then click Continue.
If you don’t wish to configure a framing boundary at this point, click Skip.
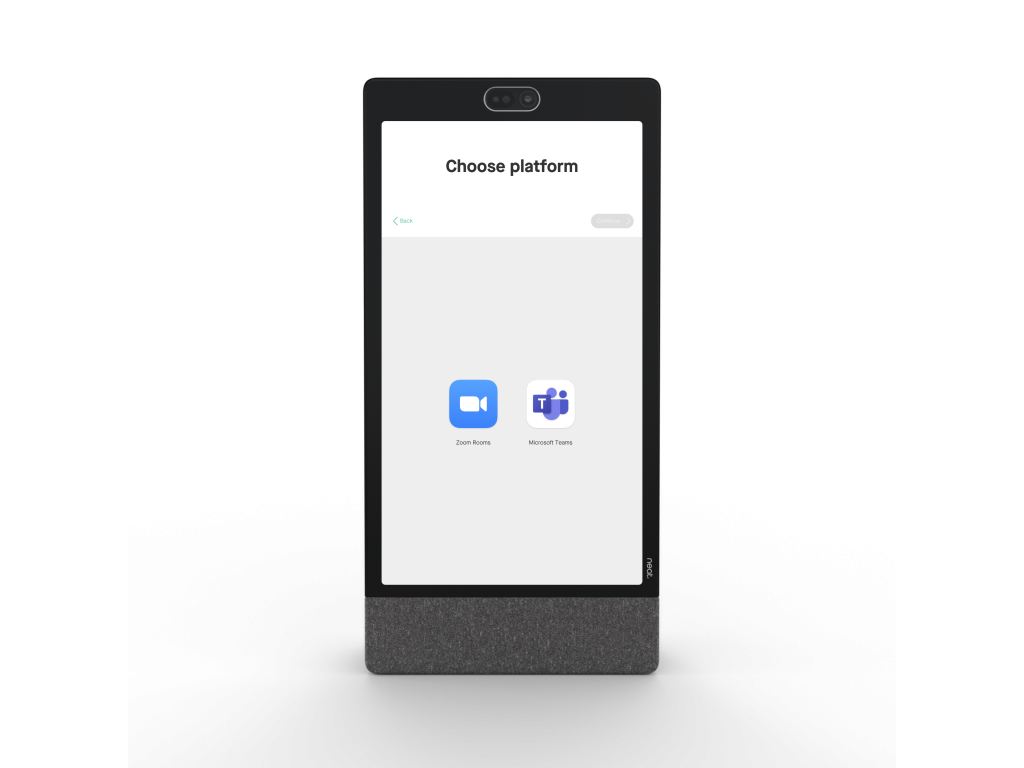
7. Choose video conferencing platform or App Hub
Tap an icon on the screen to select your preferred video conferencing platform or the App Hub icon (labelled Other) to select apps, then click Continue. The video conferencing platform will install. Do not unplug your device whilst it is installing. If you select Other, a screen will open allowing you to select the apps that you want installed on the Frame. Once completed, a prompt displays to confirm that your device is now ready to use. Click Launch.
Note: You will only see Other (App Hub icon) if you have already enrolled your device on Neat Pulse.
Once you have opened your video conferencing platform, follow the on-screen instructions to sign in to your account.
That’s it! You are now ready to use your Neat Frame!