How to Configure Auto Framing: Framing Boundary
Last updated on October 30, 2025
Contents
- Introduction
- How to configure Framing Boundary
- How to configure Framing Boundary for Neat Center(s)
- How does Framing Boundary work

Introduction
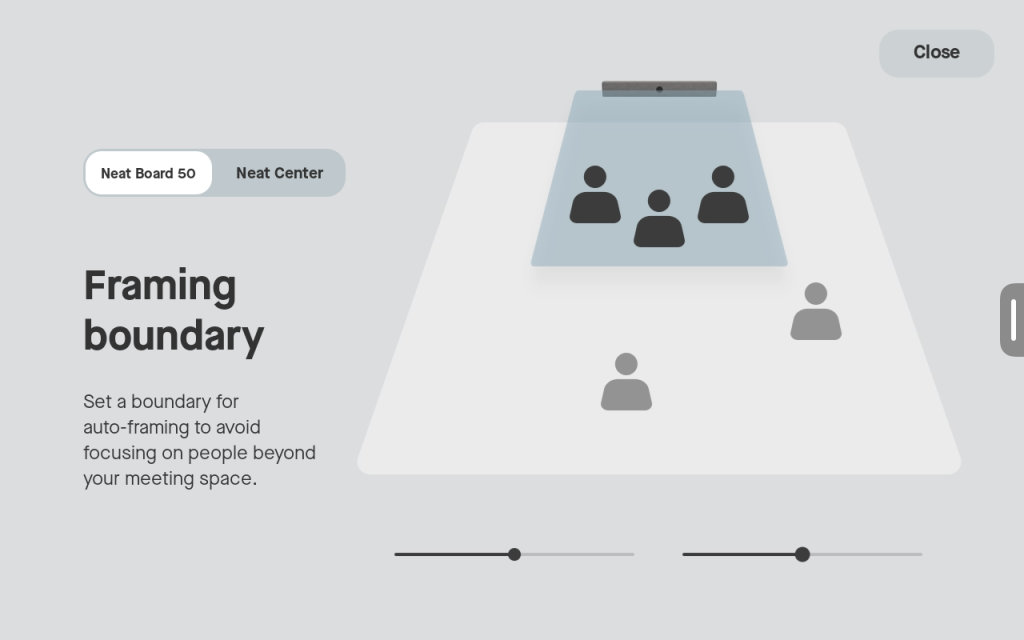
Auto framing feature allows Neat devices to optimally frame all participants in the meeting room and provide the best viewing experience for the far-end participants. It works without user intervention and can be enabled/disabled both during a call and outside of a call.
However, in certain rooms with glass walls or in open spaces, other people’s reflections or people outside the scope of the meeting may be detected.
The Framing Boundary feature allows system administrators to define the area within which Neat’s camera will operate. This means that the auto framing feature will not detect people walking outside a glass wall, but inside the set boundary, auto framing will function as expected.
Note: For more information about the Auto framing feature, see the article: Neat Symmetry: Auto Framing.
How to configure Framing Boundary
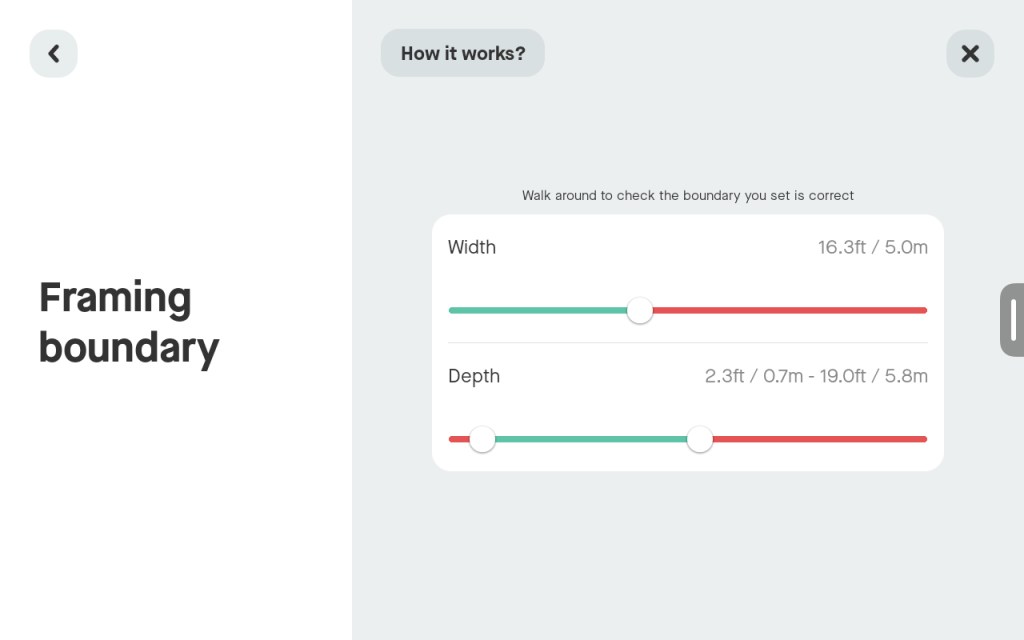
Navigate to the Neat device’s System settings > Audio & video > Framing boundary.
Here you will see the ‘Width’ and ‘Depth’ options that you can adjust to create your desired boundary as shown in Figure 1.
How to configure Framing Boundary for Neat Center(s)
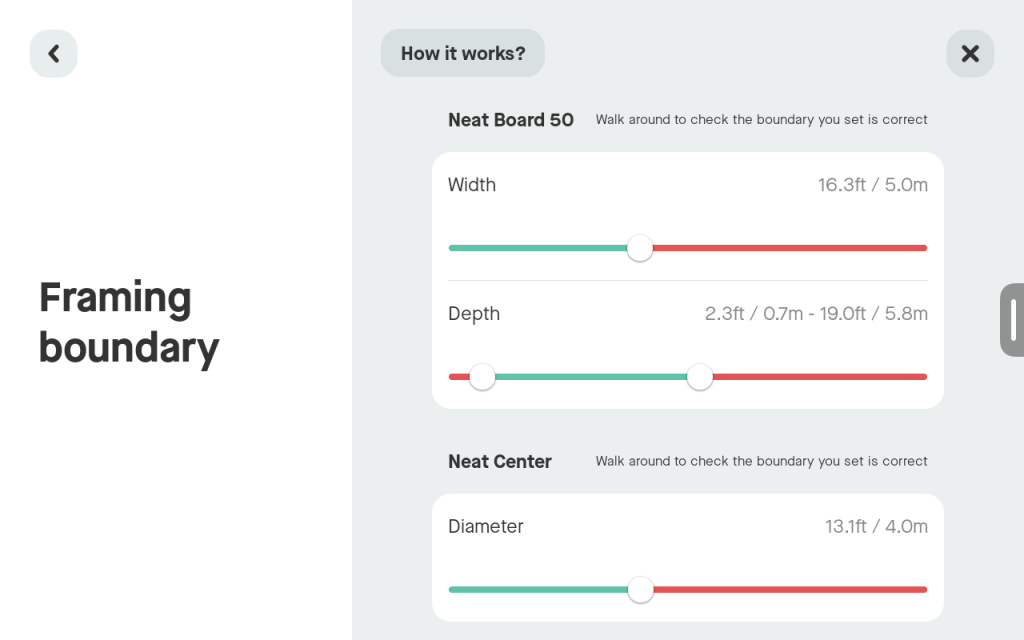
If you have one or more Neat Centers deployed in your rooms, you can independently set a Framing Boundary that applies only to a Neat Center. In this way, you can be more exact about how the entire Neat system operates in the room, who it will automatically frame with dynamic framing (Neat Symmetry), and who it will not.
Neat Center does not have its own system settings. The settings are accessible from the Bar/Boards system’s settings (i.e. the same menu as when it’s not paired with Neat Center) as shown in Figure 2.
Important:
- Neat Center does not have width and depth settings, it has a circular framing boundary, with a maximum diameter of 10 m (5 m radius). However, the radius around Neat Center will auto-adjust to the depth of the boundary pre-defined for the Neat front-of-room device (e.g. Bar Pro) if the depth is shorter than 10 m.
- If Neat Focus is enabled, i.e. “Camera selection” is set to “Custom” and only 1 camera is selected on Neat Center, then it is possible to set also width of field view, not only depth.

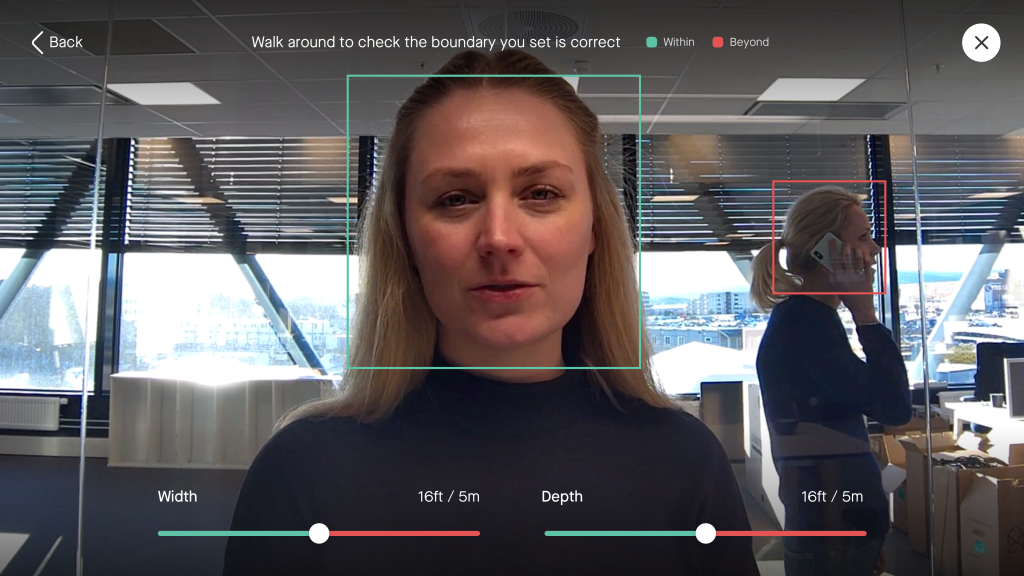
How does Framing Boundary work
When you enable Framing Boundary, you will see your self-view displayed on your TV screen/Neat Board/Neat Frame. You will also notice a green square appear around any detected participants in the room. This indicates that the person is within the auto framing boundary.
You can now start adjusting the width and depth of the boundary. Walk around the room to check if the boundary you have set is as desired. Once you are outside the framing boundary, the green square will turn red. Auto framing will not detect a participant in this part of the room as they are outside the configured boundary.
Note: On a Neat Bar, when adjusting Framing Boundary, the width and depth sliders will be on the Neat Pad. On a Neat Board and Frame, you will see the width and depth sliders below the self-view on the screen.
Note: You can only configure the Framing Boundary feature on the device. This option is not available through the Audio & Video settings on the Neat device’s web admin.