BYOD Only Mode/App (with Neat Pad)
Last updated December 17, 2025
Introduction
For customers needing to switch between multiple video conferencing platforms, Neat offers a flexible solution with the BYOD Mode. This feature allows Neat devices to be used for ad-hoc meetings on any platform, leveraging Neat’s hardware and firmware capabilities without requiring the installation of applications like Zoom or Microsoft Teams. Neat Bar, Neat Bar Gen 2, Neat Bar Pro, and Neat Board 50 can now function as fully dedicated Bring Your Own Device (BYOD) systems, enabling users to connect their laptops via USB and/or HDMI and use their preferred conferencing software.
IMPORTANT: If switching from BYOD-only mode to using Neat devices for Zoom or Microsoft Teams native applications, a factory reset of the Neat devices is required, followed by the out-of-box (OOB) setup process.
Contents
- Introduction
- Supported Devices
- 1. Instructions
- 2. BYOD behavior
- 3. Switching back to the Native Microsoft Teams/Zoom application
Supported Devices
- Neat Bar
- Neat Bar Pro
- Neat Board
- Neat Bar Gen 2 (single cable support)
- Neat Board 50 (single cable support)
- Neat Board Pro (single cable support)
Important: Standard Neat deployment requirements apply, including network connectivity for both the main room device and the Neat Pad. However, in BYOD-only mode, the device will not host or run Microsoft Teams Rooms or Zoom Rooms software. For detailed network requirements, please refer to the Network and Firewall Requirements.
1. Instructions
1.1 Complete the OOB Process
Follow the on-screen instructions to ensure the devices are connected and can access the internet (Network and Firewall requirements). Refer to the specific setup guides for each device:
- Neat Bar/ Bar Gen 2 – How to set up a Neat Bar
- Neat Bar Pro – How to set up a Neat Bar Pro
- Neat Board 50 – How to set up a Neat Board
1.2 Select BYOD-Only Mode
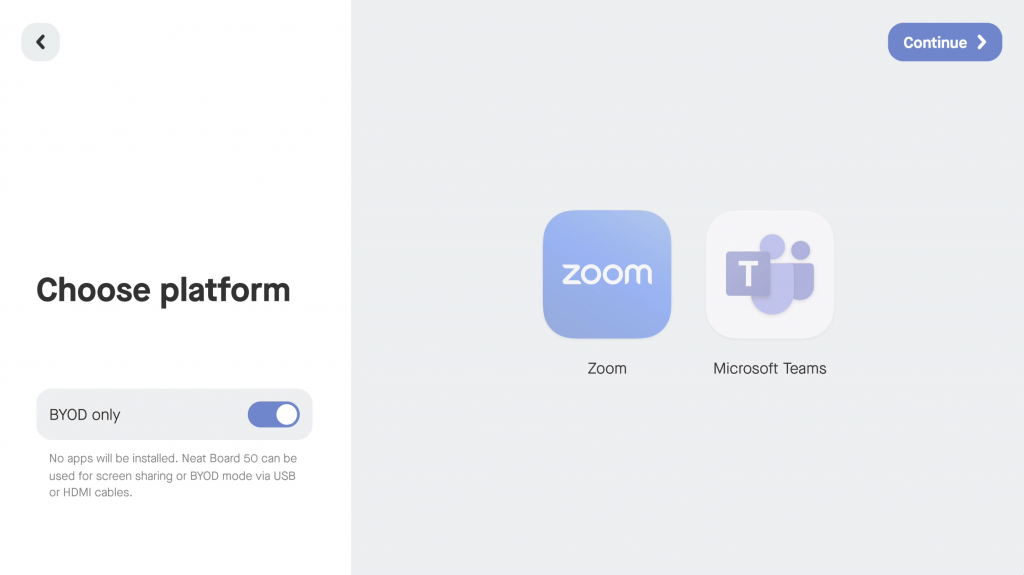
During the OOB process, once the device reaches the platform selection screen, select the BYOD-only option on the bottom left of the screen and press continue (Figure 1).
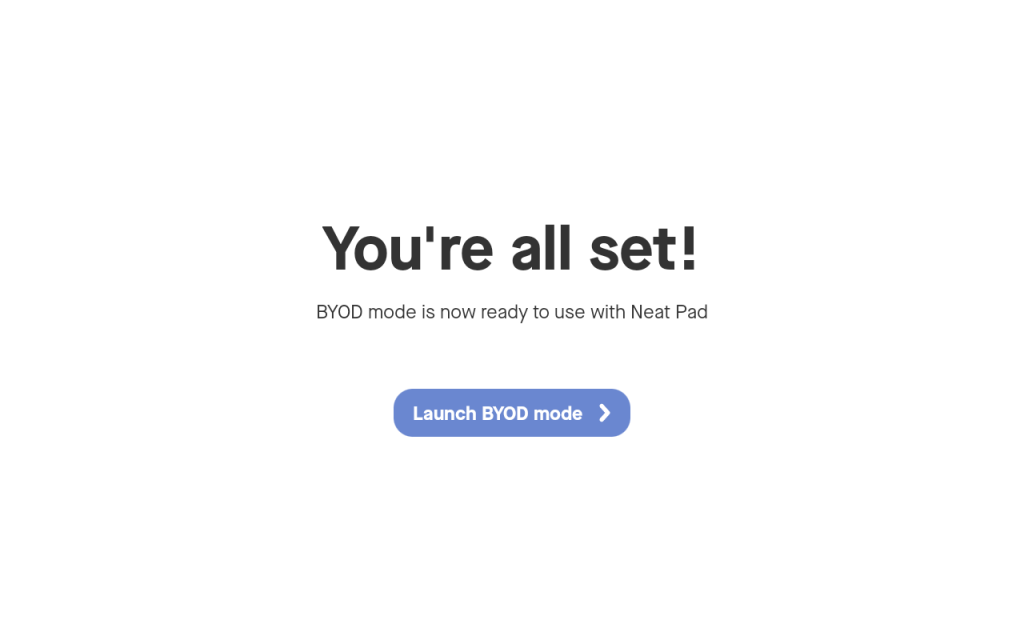
The installation process should be completed quickly, after which the option to launch BYOD mode will be available.
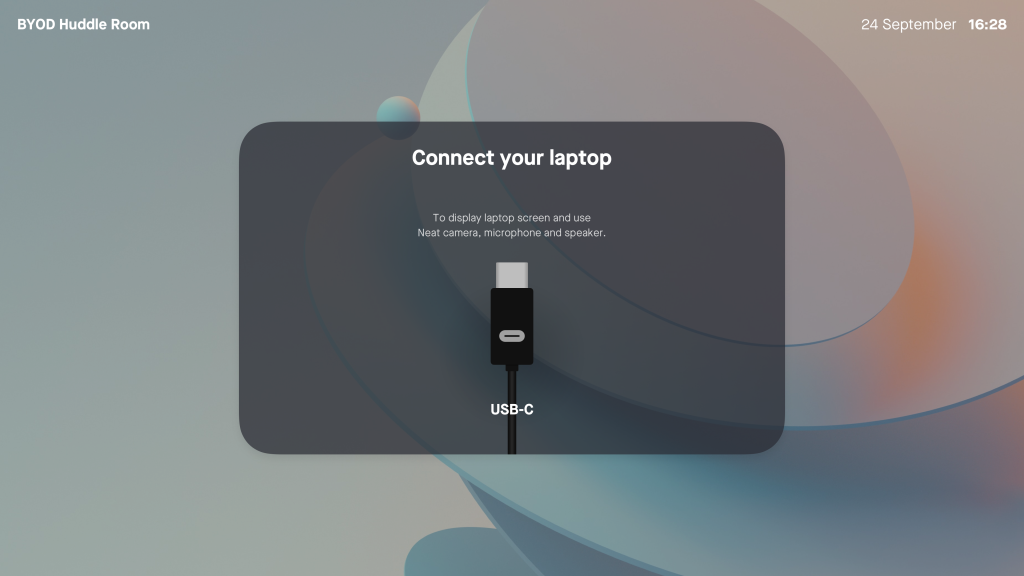
Upon entering BYOD-only mode, a guidance screen will appear, detailing how to connect a laptop to the device.
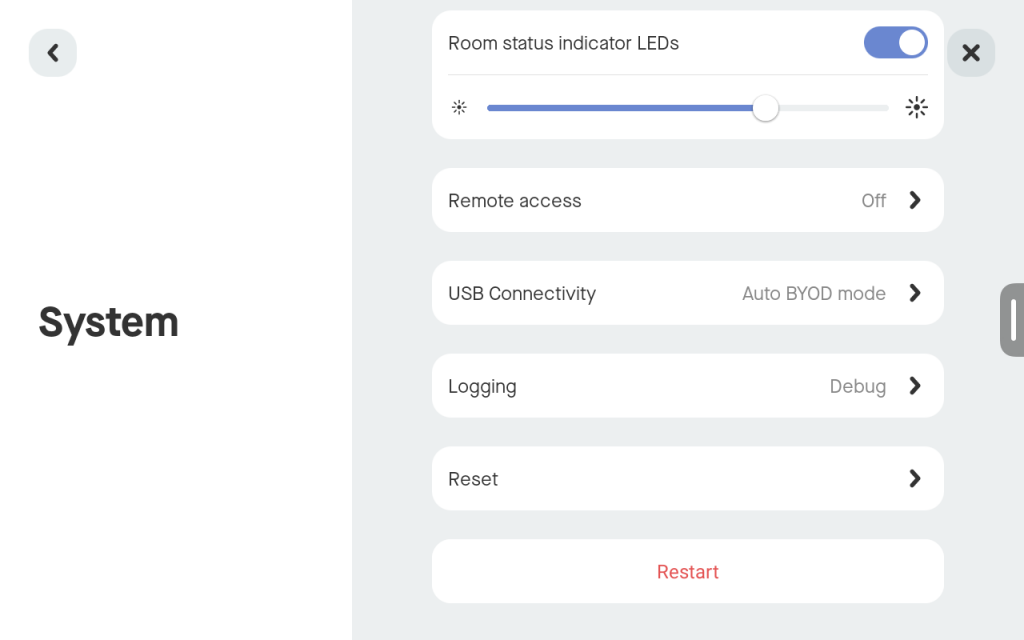
A left-swipe menu is also available, providing access to the ‘Settings’ wheel. Neat System Settings are accessible by all users unless Admin password protection is enabled.
Note: From software release 25.3.0, Admin password protection is available in all device modes, including BYOD and App Hub—not just Microsoft Teams. This makes it easier to lock down settings and prevent unauthorized changes, especially in shared spaces. Devices will use the same default password format as in Microsoft Teams (i.e. the last 6 digits of the serial number). Passwords can be set during setup or using remote access via a web browser.
1.3 Cable set up
The latest generation of Neat devices supports both a single-cable BYOD setup and the traditional cable setup (using HDMI for screen sharing alongside USB). Please see the relevant sections for detailed cable setup instructions and cable requirements:
- Neat Bar/Neat Bar Pro Section 2.3 How to Set up your Neat Bar/Bar Pro for BYOD Mode
- Neat Bar Gen 2 / Neat Board 50 Section 2.3 How to Set up your Bar Gen 2 /Board 50 for BYOD Mode
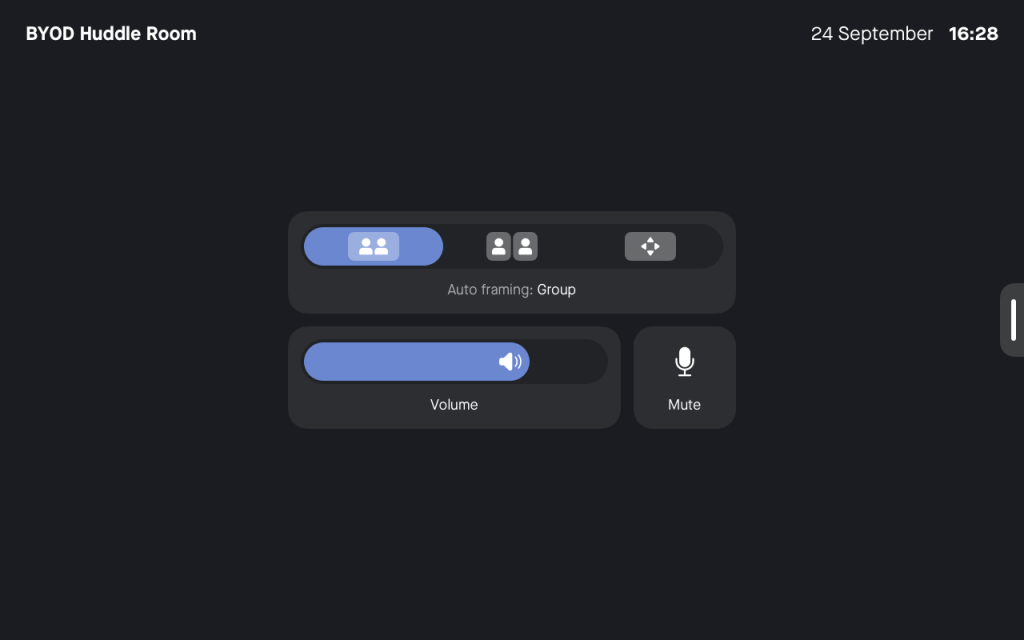
After connecting the USB and/or HDMI cables to the device, certain functions on the Neat Pad (if part of your setup) or in the left-swipe menu will be displayed. This includes the camera options for leveraging Neat Symmetry, the volume controls, and the Settings wheel in the top right-hand corner.
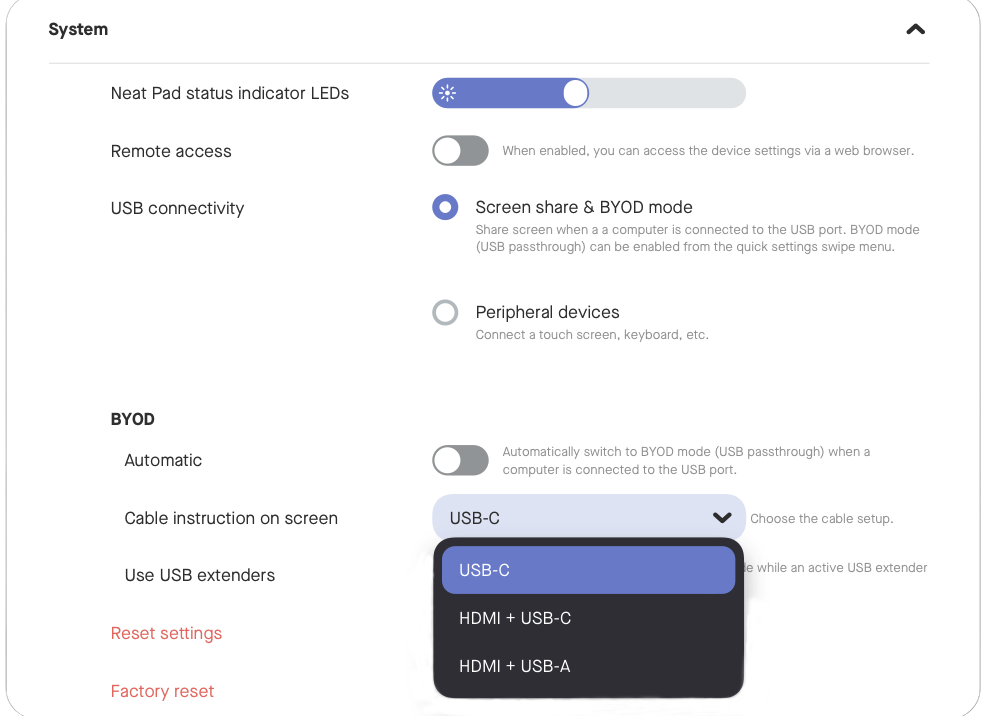
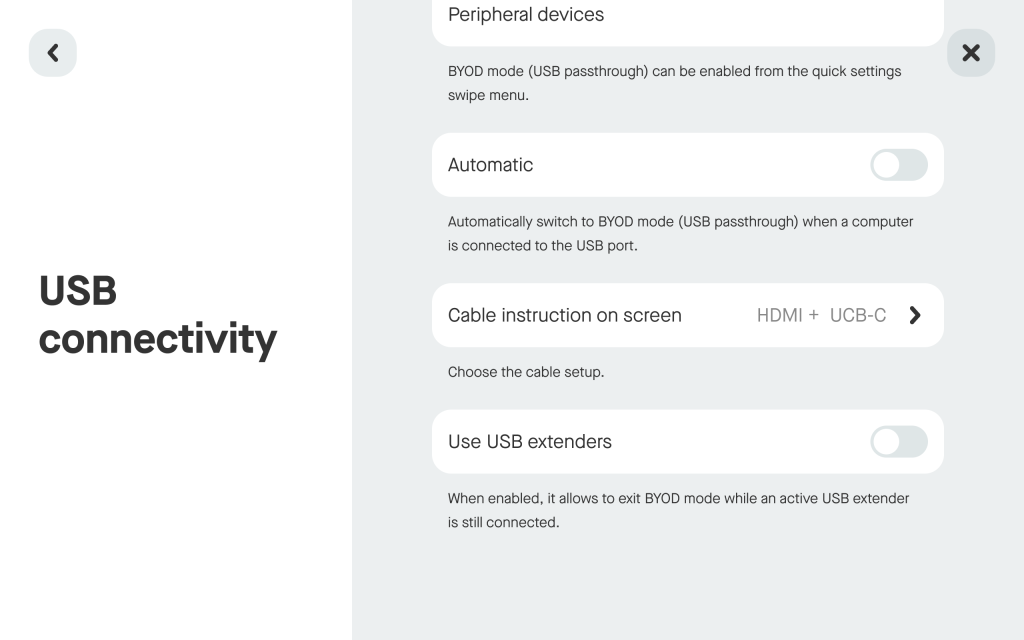
1.3.1 Customizable cable instructions for BYOD
Introduced in NeatOS 25.2, administrators can select the correct on-screen cabling instructions for BYOD setups. This ensures that the on-screen instructions in each room matches with your actual BYOD cabling setup. Customizable cable instructions can be configured both on-device and in Neat Pulse.
To configure your customizable cable instructions for BYOD:
- On Neat Pulse: go to Device settings > System > BYOD > Cable instructions on screen (see Figure 4).
or
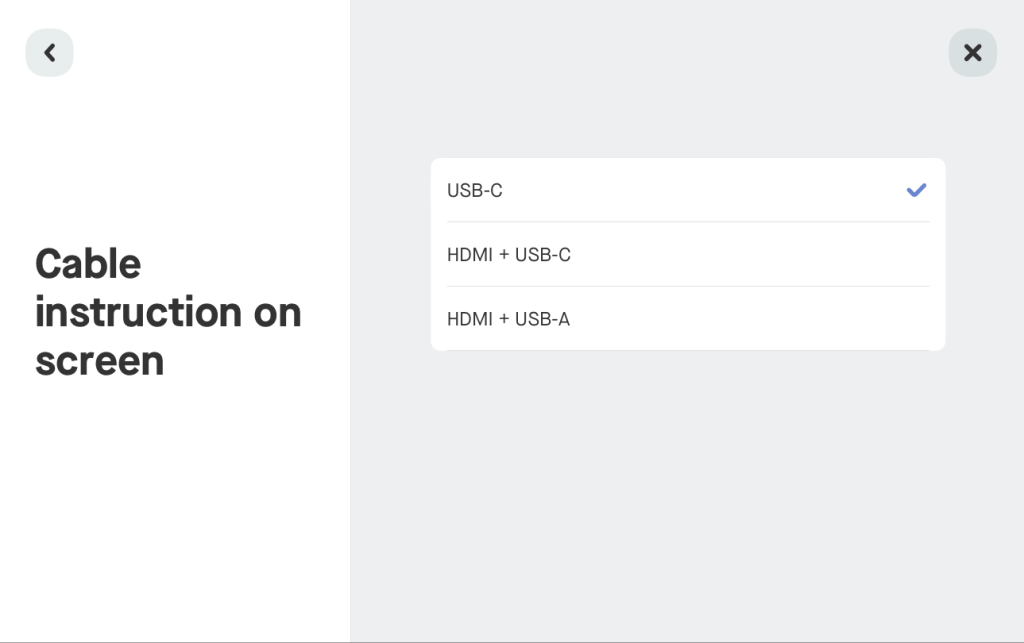
On the Neat device’s system settings (requires a paired Pad), go to: System > USB Connectivity > Cable instructions on screen (see Figure 5). - From the dropdown, select one of the three options: USB-C (default), HDMI + USB-C, or HDMI + USB-A to match the cabling requirements of your room.
Based on this selection, the screen will display clear instructions for the user to follow.
1.4 Set Neat Device as your default Video and Audio Devices
- Open your preferred video conferencing application on your computer.
- Set the default devices for the camera, microphone, and/or speakers to the Neat Device (named ‘Neat Bar…’ or ‘Neat Bar Pro…’).
- You can enable only the hardware you need. For example, use the Neat device’s camera and microphone while using your computer’s built-in speakers etc.
Note: If you are having issues with adjusting the volume on Mac devices, please see this article by Apple on adjusting sound output settings.
Platform Setup Articles
- Zoom – Changing Video and Audio Settings
- Microsoft Teams – Changing your default mic, speakers, or camera
- Webex Teams – Choose your audio and video settings
- Google Meet – Change your Video and audio settings
- FaceTime -Choose a camera or Microphone
2. BYOD behavior
When BYOD-only mode is selected as the application, the USB connectivity setting within Neat’s System Settings will automatically switch to Auto-BYOD mode (Figure 5). This means that as soon as the Neat Device detects a laptop connected to the other end of the cable it will automatically trigger the USB connection for BYOD.
2.1 USB extenders
This setting is designed for customer setups that use specific types of USB extenders for BYOD mode. Most USB extenders rely on a V-BUS line connection, which typically carries a 5V supply, to trigger the electrical components within a USB device. However, a small subset of extenders do not switch this power on or off based on the presence of a laptop. Instead, they send suspend commands when the laptop is disconnected or when the USB extender enters power-saving mode.
When the USB extender option is enabled, Neat devices will listen to the suspend command from the USB extender. When the toggle is off, the Neat device will instead rely on the V-BUS line connection to enable or disable BYOD mode.
2.2 BYOD screen
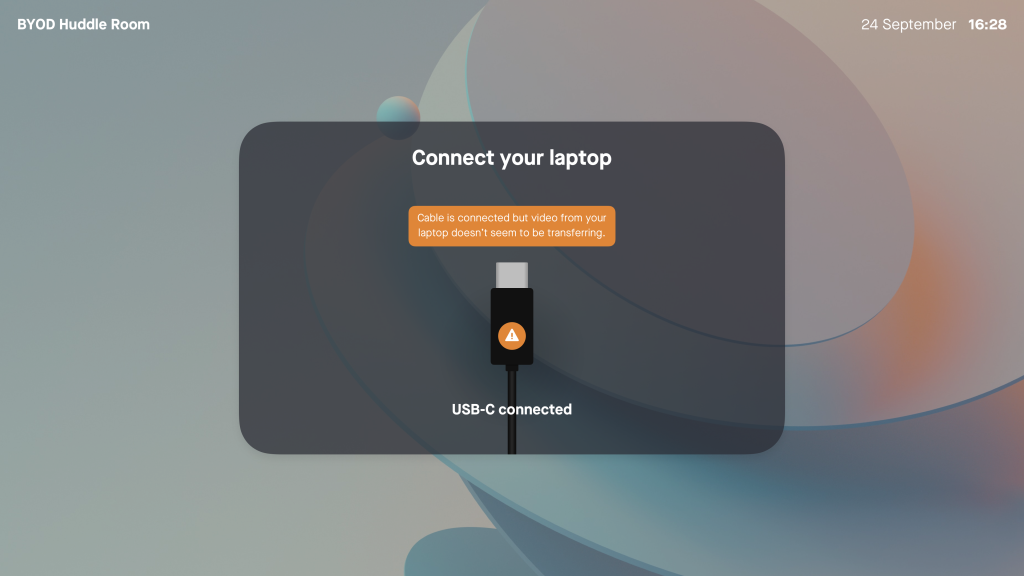
If cables have not been correctly set up as described in Section 1.3 or if they do not meet the DisplayPort requirements for USB on Neat Bar Gen 2 and Board 50, you may encounter an error screen. In this case, change to a USB cable that meets the requirements or insert an HDMI cable into the HDMI-in screen-sharing port to mirror your laptop’s screen.
3. Switching back to the Native Microsoft Teams/Zoom application
If you wish to use BYOD mode in conjunction with either the Zoom or Microsoft Teams native applications and only use BYOD when necessary, you will need to factory reset the device, go back through the OOB process, and select your preferred application. You can then still enjoy BYOD mode when needed by following the instructions here: Overview: USB Connectivity and BYOD mode for Neat Devices, while keeping Zoom/Microsoft Teams running in the background.
Enjoy the Neat experience on any platform!
With this, you should now be fully set to use your Neat Device with any video conferencing application!