How to Set Up Neat Board
Last updated December 1, 2025
Neat Board is a perfect all-in-one, highly capable meeting room device with an elegant design. Its 65-inch touchscreen display allows for the perfect solution for any huddle, focus, or meeting space.
This article gives step-by-step instructions on how to set up your Neat Board (brand new out of the box or after a Factory Reset), connecting it to your network either wirelessly or by Ethernet.
Contents
- Prerequisites
- What’s Included
- Bought separately
- 1. Choose your mounting option
- 2. Power up your Neat Board
- 3. Connect Neat Board to the Internet
- 4. Enroll your device on Neat Pulse (optional)
- 5. Choose video conferencing platform or App Hub
- 6. Pairing a Neat Pad (Optional)
Prerequisites
- Neat Board must meet the following network requirements in order to successfully connect to the internet Network and Firewall requirements for Neat devices.
- If you are planning to use Wi-Fi, please read the article Wi-Fi support on Neat devices.
What’s Included
The Neat Board comes with everything you need to get started. Inside the box you will find:
- Neat Board
- 2x Neat Markers for hands-free touch and annotations
- Neat marker holder, which doubles as a cable management option
- Table stand legs
- Power cable
- Ethernet cable
Bought separately
Neat offers alternative mounting options that can be added at the time of purchase or by contacting a Neat Sales Representative:
- Neat Board Floor Stand
- Neat Board Wall Mount
You can also purchase a Neat Pad separately to use as meeting control or to display room availability.
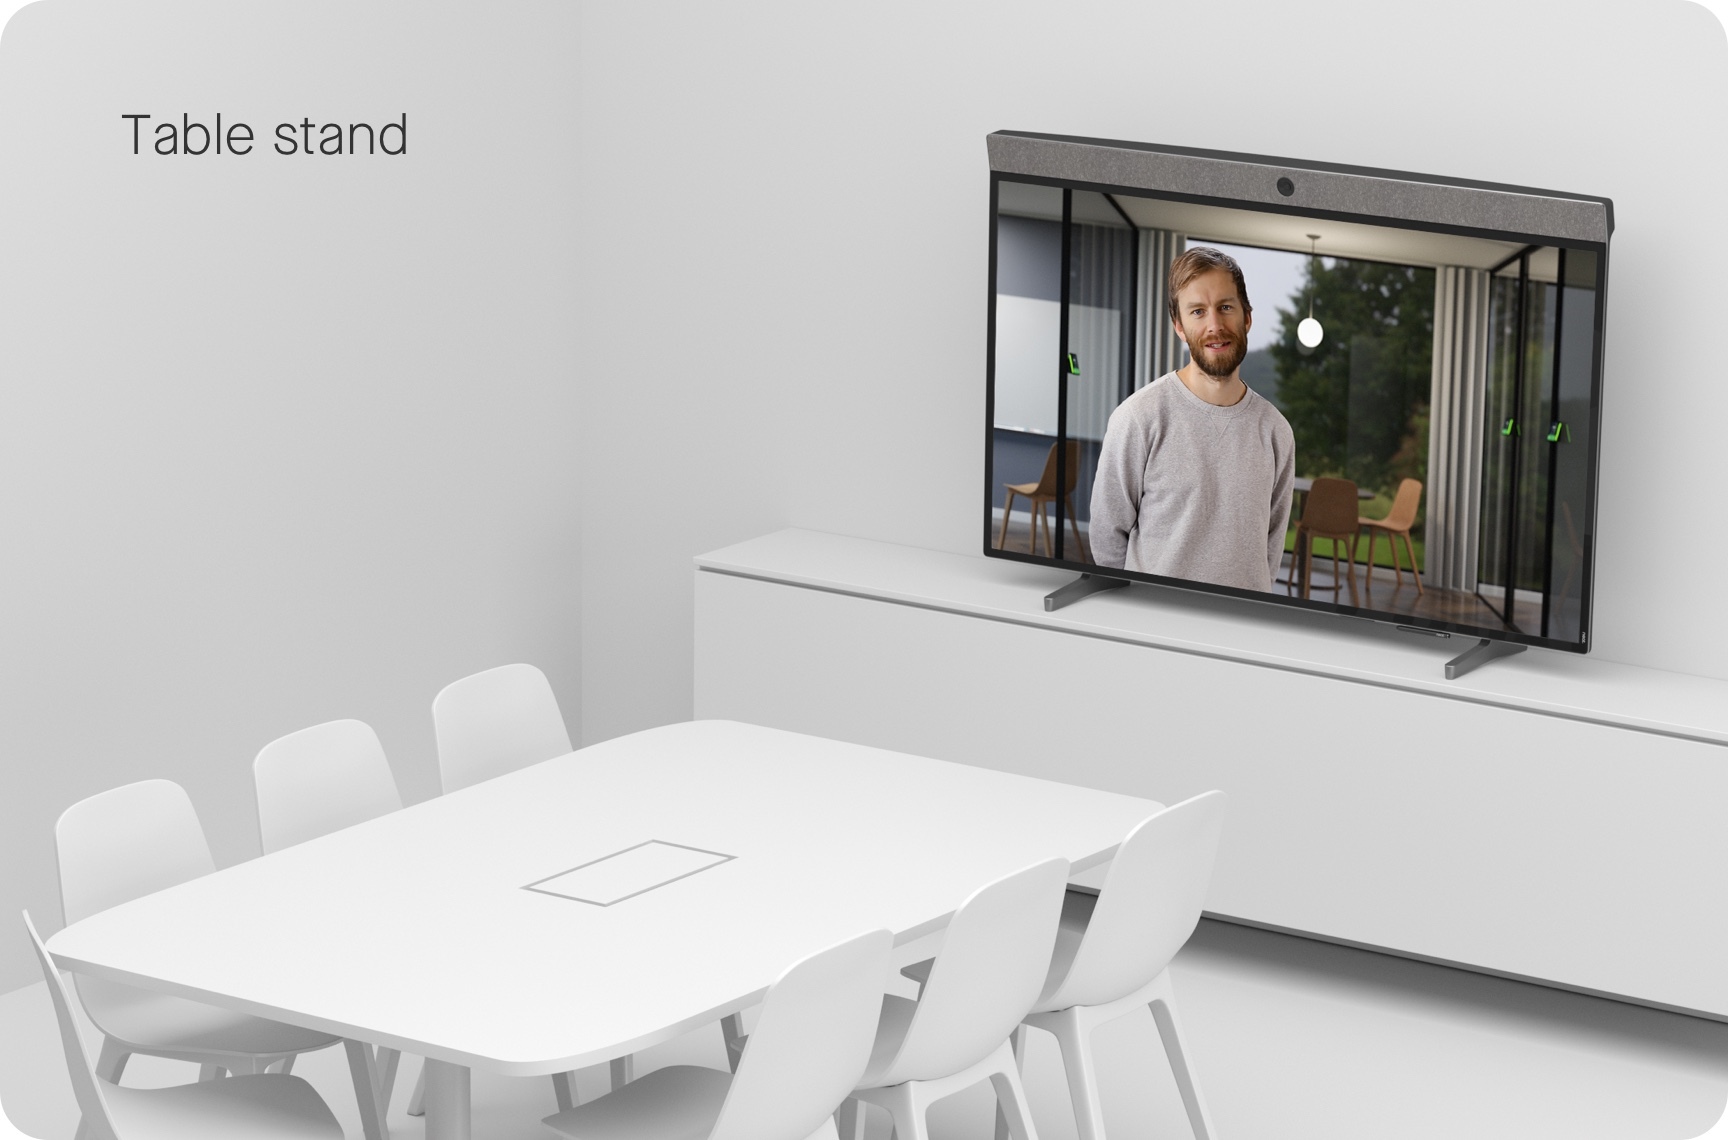
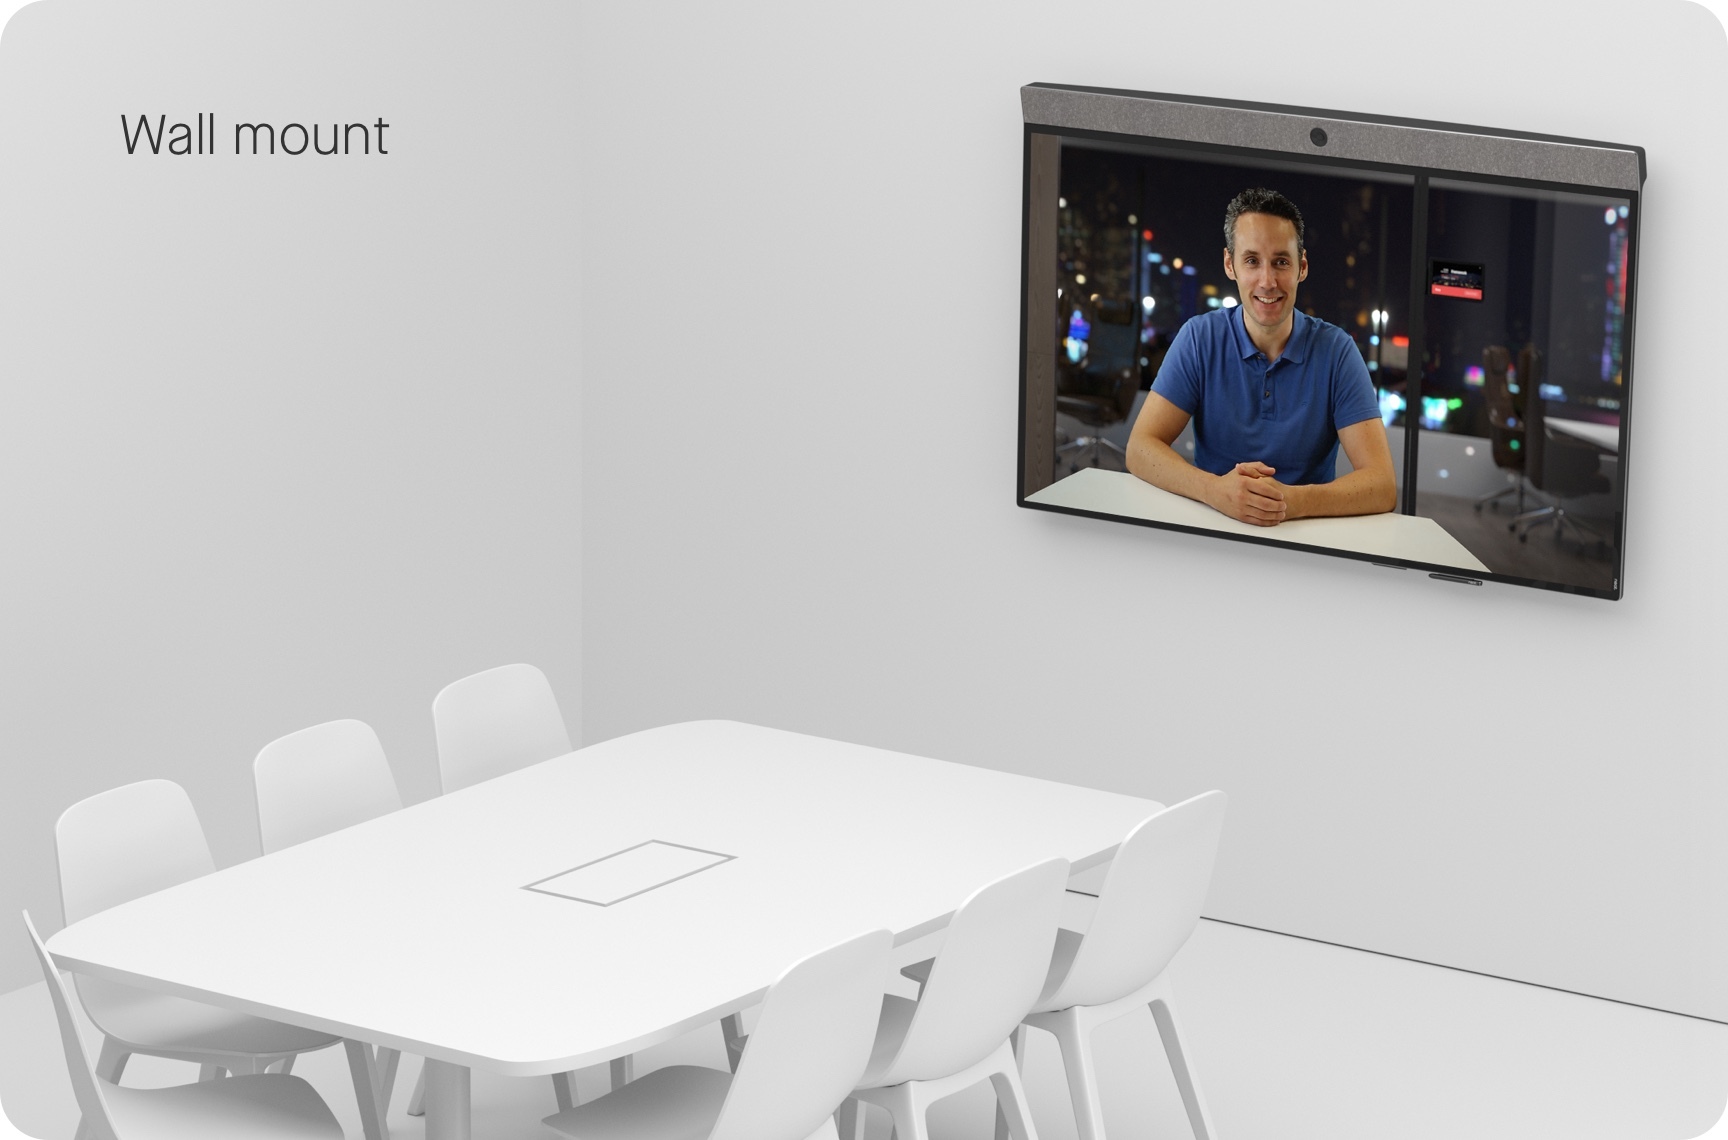
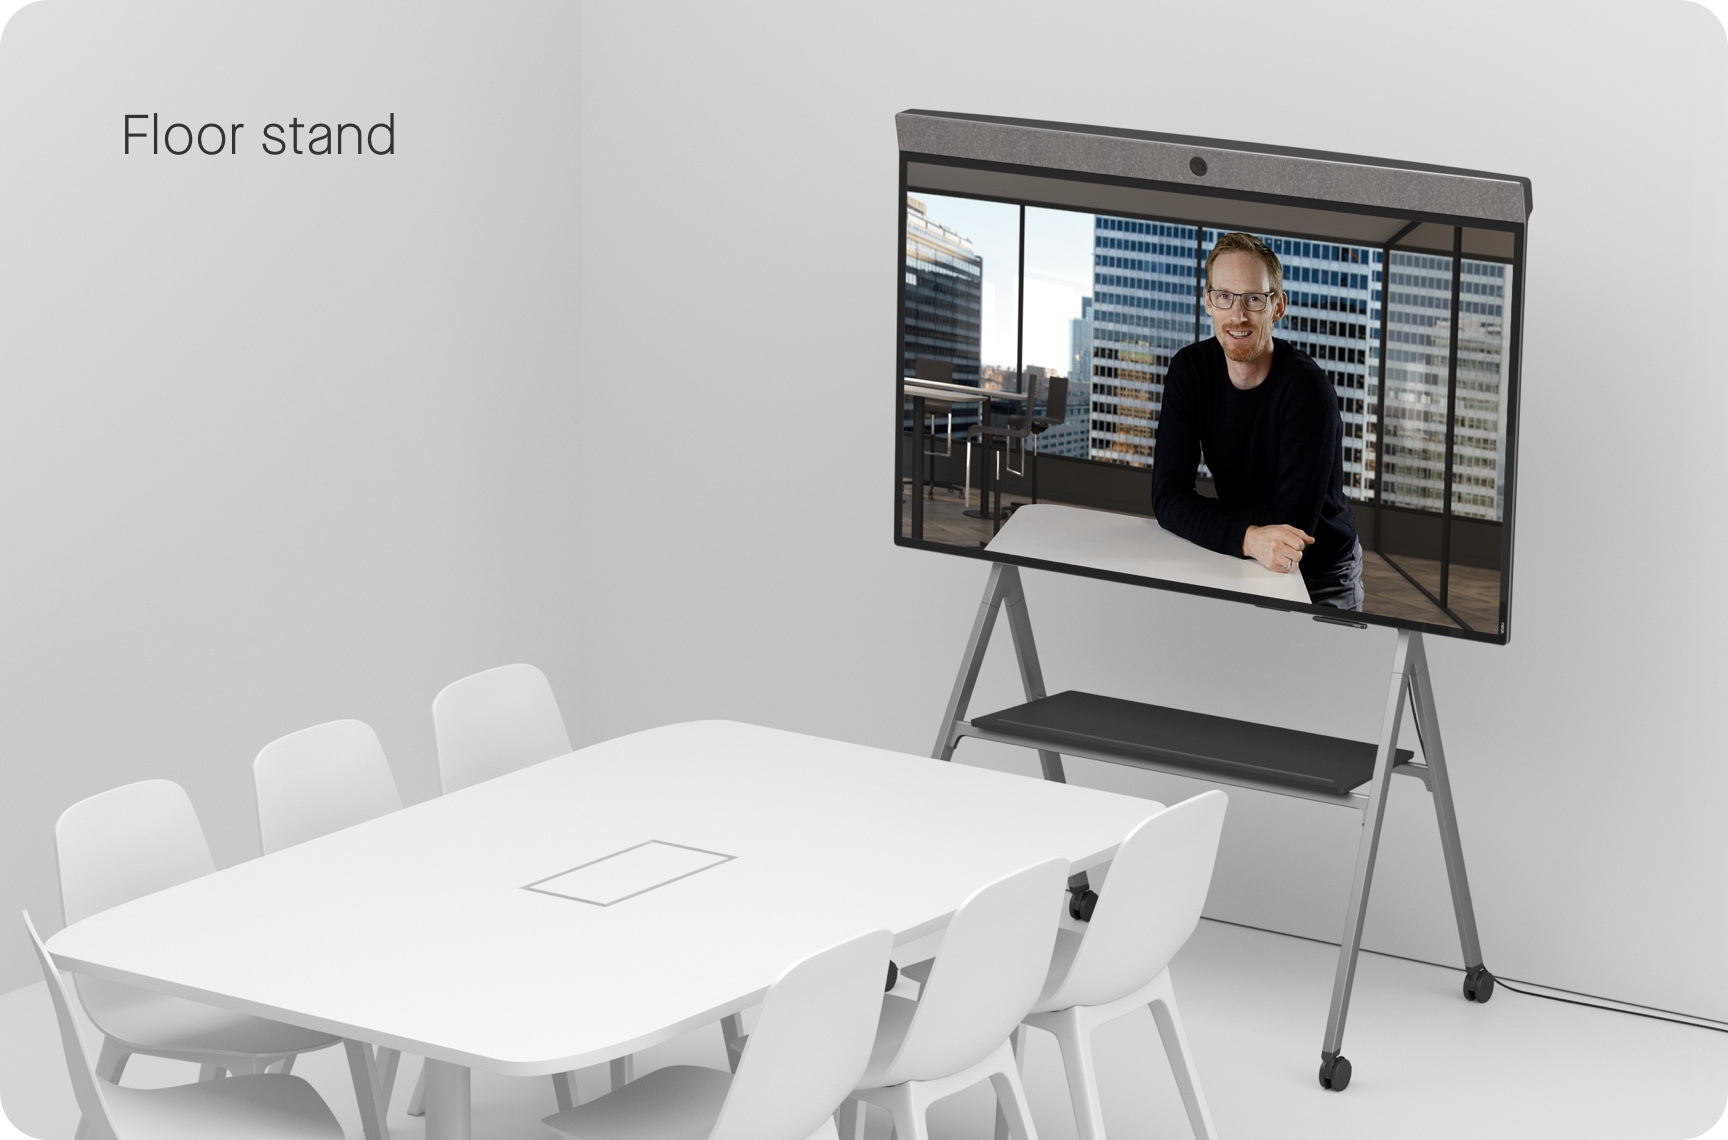
1. Choose your mounting option
You can mount your Neat Board on a table, wall mount, or floor stand. The wheeled floor stand provides the extra flexibility to easily meet wherever you prefer. Choose your preferred mounting option below to access the mounting guides.
 |  |  |
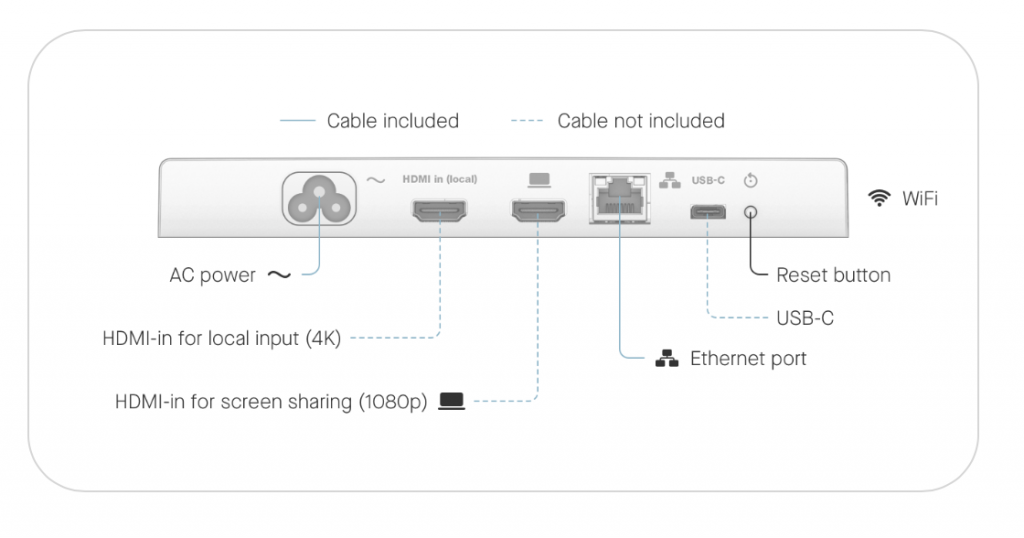
2. Power up your Neat Board
- Connect your Neat Board to AC power
- If you want to connect the Neat Board to a wired network, connect it to your network using an Ethernet cable.
- Once this is done, follow your Neat Board’s instructions to set up Time and Language then press Continue.
3. Connect Neat Board to the Internet
- If you’ve connected your Neat Board using Ethernet cables to a wired network, you should be connected to the internet automatically. Otherwise, you will need to connect the Neat Board to Wi-Fi. If you are using Wi-Fi, please follow the instructions in Wi-Fi support on Neat devices under the Neat Board section.
- Note: If a Neat device has a wired Ethernet connection to it, it will always use Ethernet. In order to force a Neat device to use Wi-Fi, there should be no Ethernet cable physically connected to the Board.
- Once the Board has successfully connected to the internet, it will now download any software updates available. Do not power off or disconnect the internet to Neat Board during updates.
4. Enroll your device on Neat Pulse (optional)
The next screen gives you the option to enroll your devices on Neat Pulse. If you don’t wish to enroll your devices at this point, click Skip. Otherwise follow these steps.
Important Note: You can only use your device to access apps on Neat App Hub after you have enrolled your device on Neat Pulse.
- Go to https://pulse.neat.no/ and login.
- If you already have a named space created in Pulse that you wish to add your Neat device to, simply open that space and click Generate Code.
If you want to create a new named space in Neat Pulse or find out more information on enrolling devices to Pulse, see the article How to Enroll a Device in Neat Pulse. - Enter the generated code on the screen.
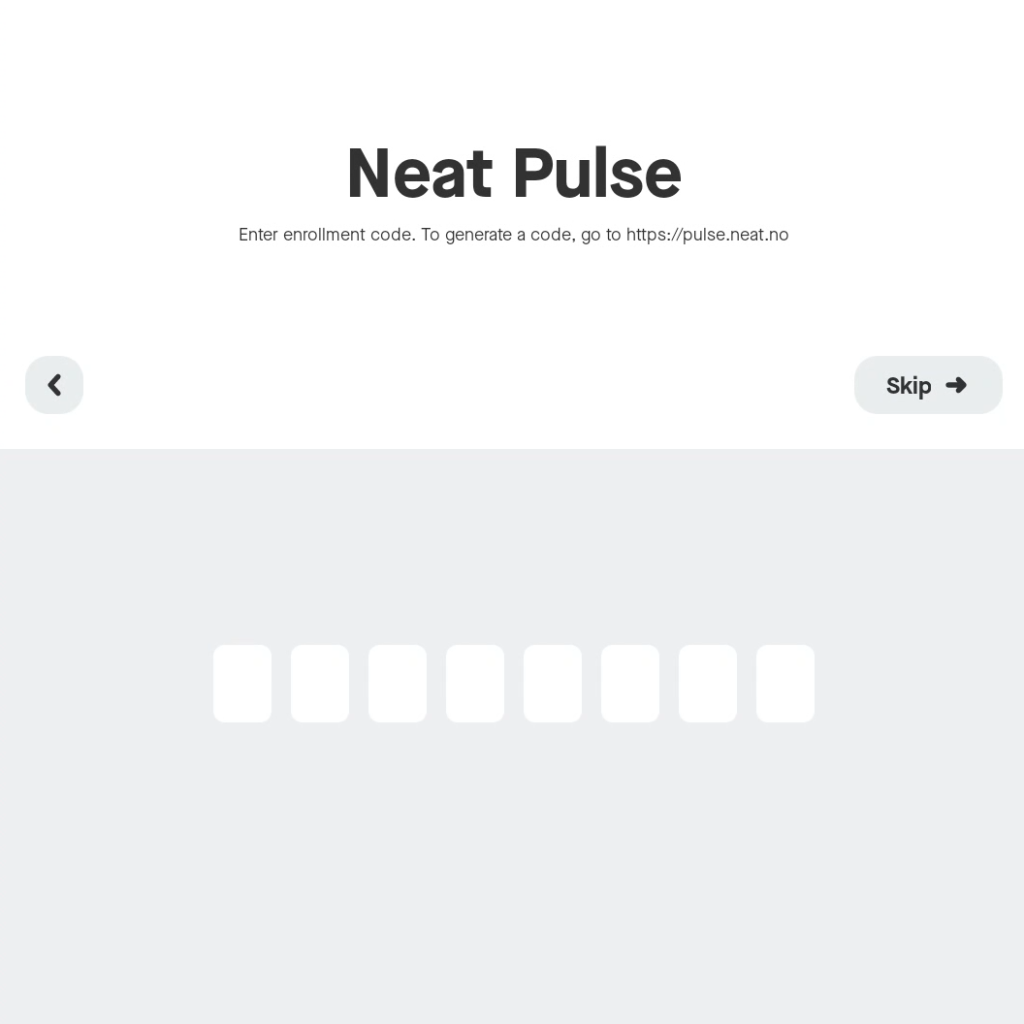
- The screen will show a progress bar to confirm that it is enrolling the devices on Neat Pulse. Do not unplug your devices during this process.
- Once completed, the screen will show that the devices have been added to Neat Pulse.
- If you view Neat Pulse you will now see your newly added device in the designated named space.
- Click Continue.
Note: If you skipped this step and wish to enroll your devices on Neat Pulse at a later date, simply go to Settings > General > System settings > Add to Neat Pulse on your device interface and follow the steps above.
5. Choose video conferencing platform or App Hub
Tap an icon on the screen to select your preferred video conferencing platform or the App Hub icon (labelled Other) to select apps, then click Continue. The video conferencing platform will install. Do not unplug your device whilst it is installing. If you select Other, a screen will open allowing you to select the apps that you want installed on the Frame. Once completed, a prompt displays to confirm that your device is now ready to use. Click Launch.
Note: You will only see Other (App Hub icon) if you have already enrolled your device on Neat Pulse.
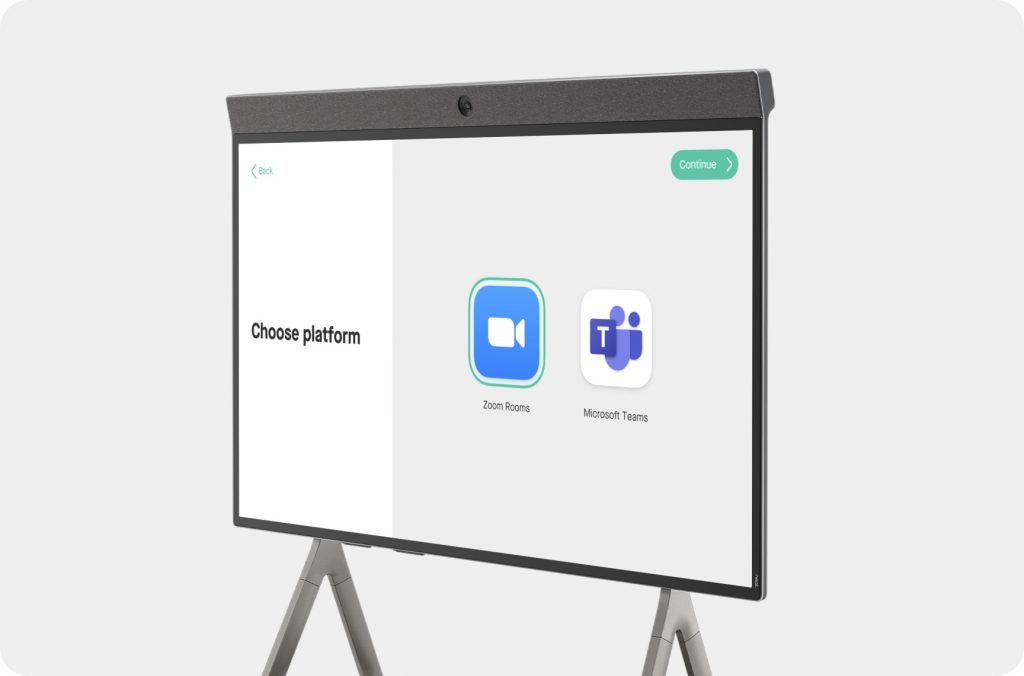
The video conferencing platform will install. Do not unplug your devices whilst it is installing. Once completed, a prompt displays to confirm that your device is now ready to use and You’re all set! Click Launch.
Once you have launched either Zoom Rooms or Microsoft Teams, you can sign in to your accounts:
- Zoom: Activate your Zoom Room either by entering the device activation key here, signing in with your Zoom account directly on the Pad and selecting the correct Zoom Room, or using the Activation Code found in the Zoom Device Manager.
For more information on Zoom level pairing see Understanding Neat and Zoom Pairing on Neat devices - Teams: Activate your Microsoft Teams Room by registering both the Board to your account here.
For more information on Microsoft Teams level pairing see Understanding Neat and Microsoft Pairing on Neat devices
6. Pairing a Neat Pad (Optional)
While not required, the addition of a Neat Pad allows easy and hassle-free meeting controls to get the most out of the video conferencing experience. See here for more instructions: How to Pair a Neat Pad to a Neat Board.