
How to Configure a Static IP on Neat Devices
Last updated November 5, 2026
Neat devices can be configured with a static IPv4 when connected to a wired network. Static IP configuration allows an administrator to manually assign an IP address, subnet mask, gateway, and DNS servers to a Neat device, overriding the default DHCP configuration.
Important Note: Static IP configuration is not currently available for wireless networks.
Contents
- Prerequisites
- Configuration overview
- 1. Configure Static IP during OOB
- 2. Configure Static IP after OOB
Prerequisites
- To configure Static IP the devices must first receive an IP address from a DHCP server.
- Ensure all devices (e.g. Pad, Bar, Board, Center) are running minimum Neat OS software version 25.4.2.
- Neat Devices supported: Pad, Bar, Board, Center*
*Note: You can only configure Static IP on Neat Center using remote access.
Configuration overview
There are two points where a Static IP can be configured, i.e. during OOB or after OOB setup, and the supported configuration method is dependent upon device type, as shown in the table below:
| When to configure Static IP | Touch device (e.g. Pad/Board/Frame) | Non-touch device (e.g. Center/Bar) |
|---|---|---|
| During out-of-box setup (or post factory reset) | – Remote Access Web Admin Page – Directly on Network Settings Page on Device | – Remote Access Web Admin Page |
| After out-of-box setup and pairing with front of room (FOR) device | – Remote Access Web Admin Page – Directly on Network Settings Page on Device | – Remote Access Web Admin Page * -Directly under Network Settings † |
* For Neat Center you can only set up Static IP using the Remote Access Web Admin Page.
† When using the Pad’s UI, we recommend that you configure Static IP on your non-touch Neat device first; otherwise, pairing with the FOR device will break momentarily (depending on whether the Static IP configured is in the same subnet).
1. Configure Static IP during OOB
1.1 Directly on the touch device UI
This option applies when the device is brand new or has just been factory reset.
Important Note: It is only possible to directly configure Static IP on the user interface for Neat Board and Neat Pad as a standalone controller or scheduler. We strongly recommend for setups with Neat Bar and Pad paired together, you configure using remote access during out-of-box setup. Alternatively, pair and set up the devices (after OOB), and configure using the touch device UI or the remote access UI.
- On Neat Pad/Neat Board, go to Network settings → Configure IPv4 → Manual to locate the DHCP settings.
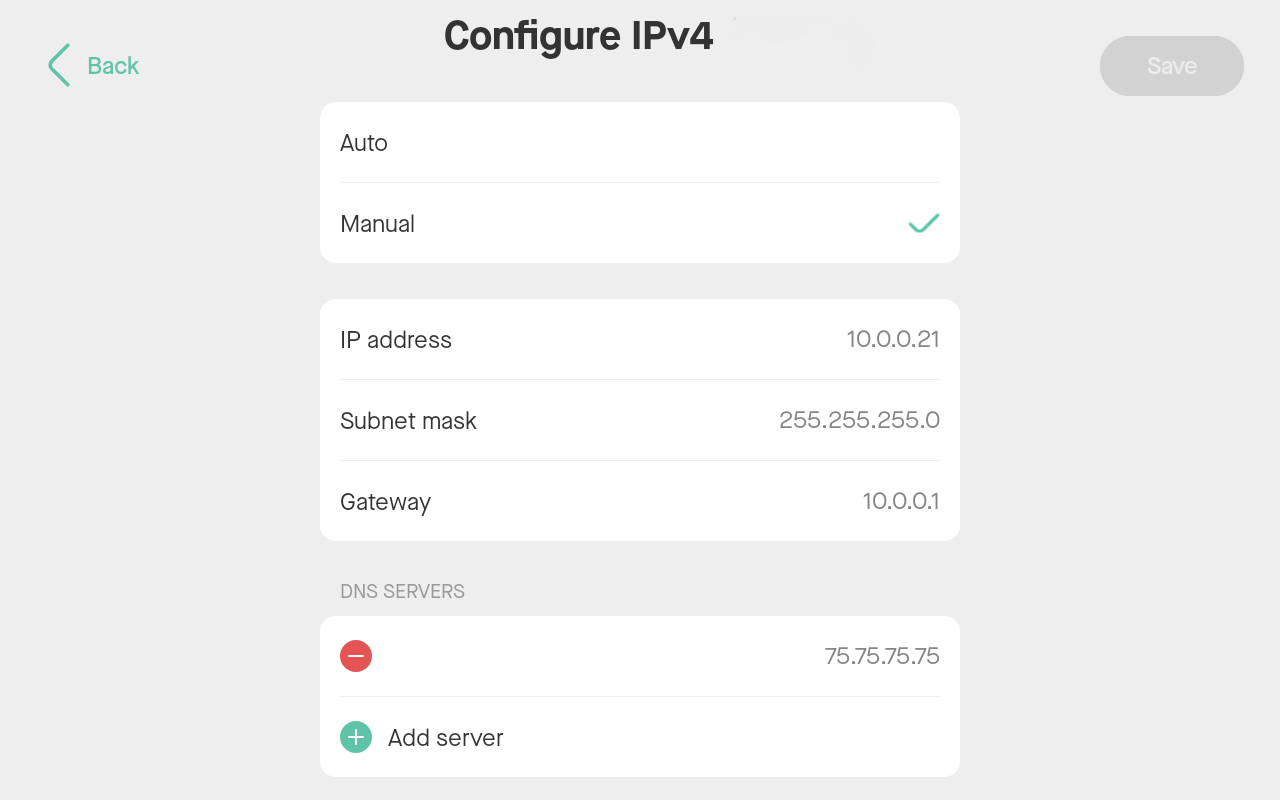
- Manually assign an IP address, subnet mask, gateway, and DNS servers and save.
1.2 Using remote access UI
To enable remote access during OOB setup, follow the steps in the section: Enable Remote Access – During OOB set up for your particular setup.
Once you have enabled remote access during OOB setup and signed in, the Status page is initially displayed as shown in Figure 2.
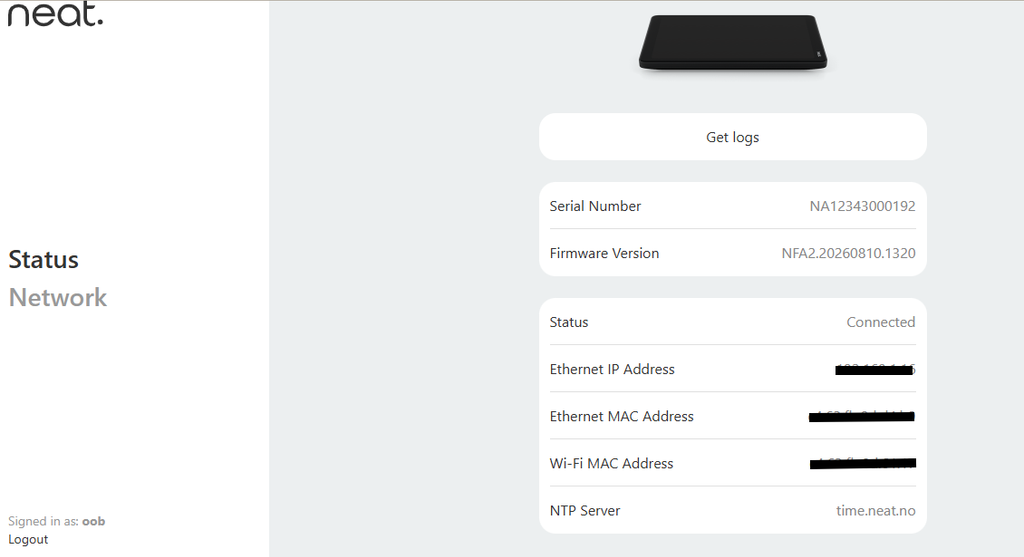
- Select Network from the left-hand menu.
- Select Ethernet > IP Configuration and change the setting from DHCP to Static. You will see additional fields where you can manually enter the network details for the Static IP configuration (see Figure 2).
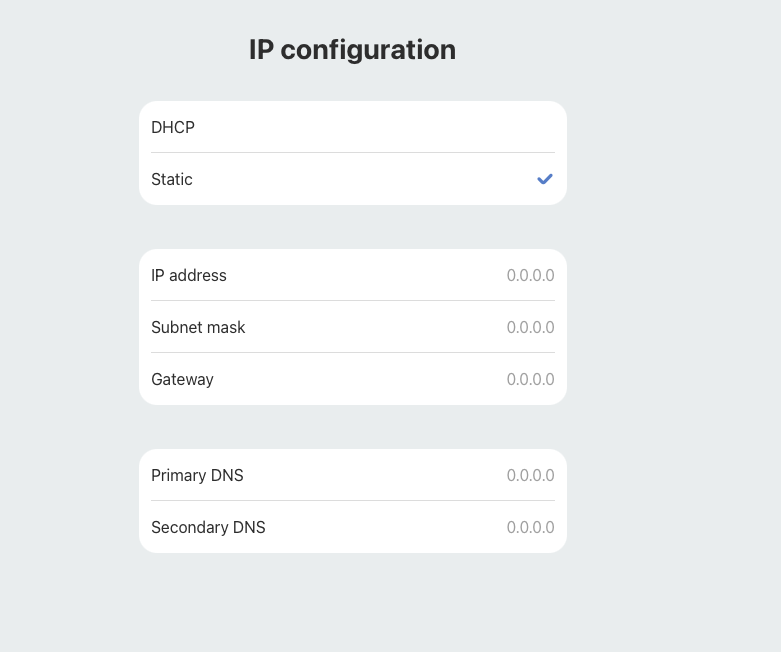
- Save the settings. The device will then operate using the configured Static IP, after which you can proceed with normal pairing and setup.
- Repeat this process for each device in your setup, e.g Neat Pad, Neat Bar, Neat Center.
2. Configure Static IP after OOB
2.1 Directly on the touch device UI
- To set a Static IP, the device must go through the whole out-of-box installation and device setup process and launch the chosen platform. (For details, see How to set up your Neat device.)
- Access Neat Systems settings.
- Go to Settings → General → System Settings → Network to show the IP address of each device (see Figure 2).
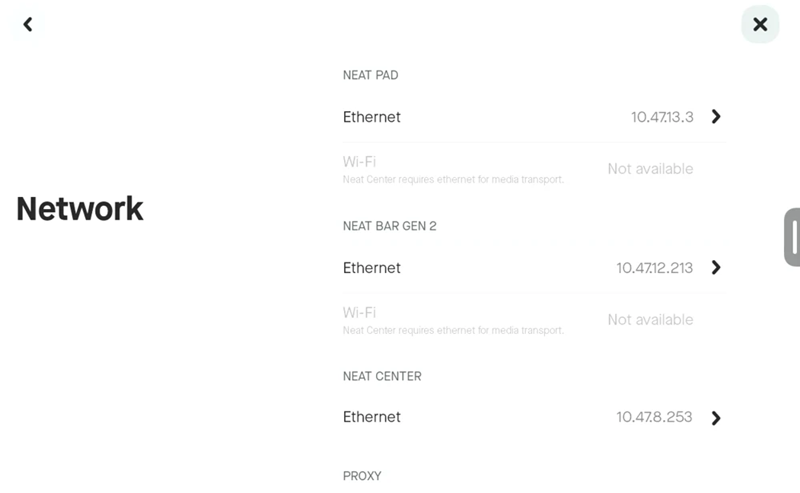
- Select Ethernet for the device that you wish to configure.
IMPORTANT NOTE: For Bar and Pad setups — always configure the Static IP for the Bar first, and then the Pad (second) from the UI. This is because it’s possible that the devices will unpair if placed in a different subnet and once unpaired in this situation you will lose control of the Bar through the UI.
- Select the Configure IPv4 option and configure your Static IP (see Figure 3).
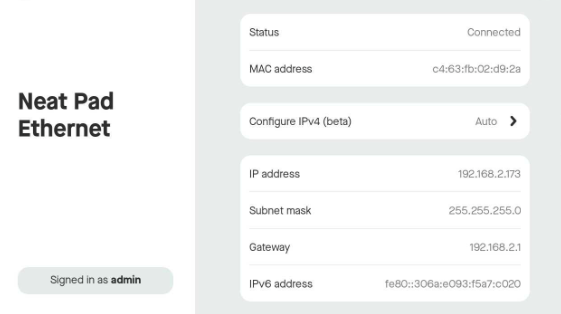
Note: Unlike the Bar and Pad, Neat Center does NOT show the IPv4 section on Network settings (compare Figures 3 and 4). Therefore you need to enable the Remote Access Web Admin Page to set Static IP on Neat Center, see Using remote access UI, see below.
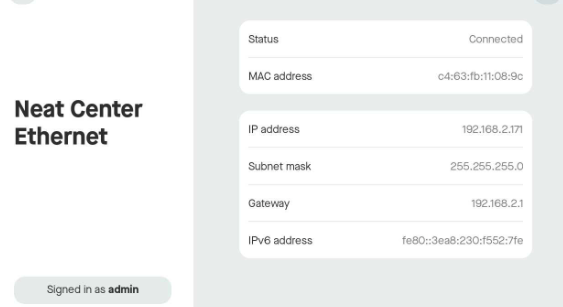
2.2 Using remote access UI
To enable remote access after OOB setup, follow the steps in the section: Enable Remote Access – After OOB set up.
- Login using the credentials configured in step 3 of section Enable Remote Access – After OOB set up.
- The Status page is initially displayed.
- Select Network Settings on the left-hand side menu.
- Select Ethernet > IP Configuration and change the setting from DHCP to Static. You will see additional fields where you can manually enter the network details for the Static IP configuration.
- Save the changes. The Static IP mode set pop-up on the Admin page (see Figure 6) displays.
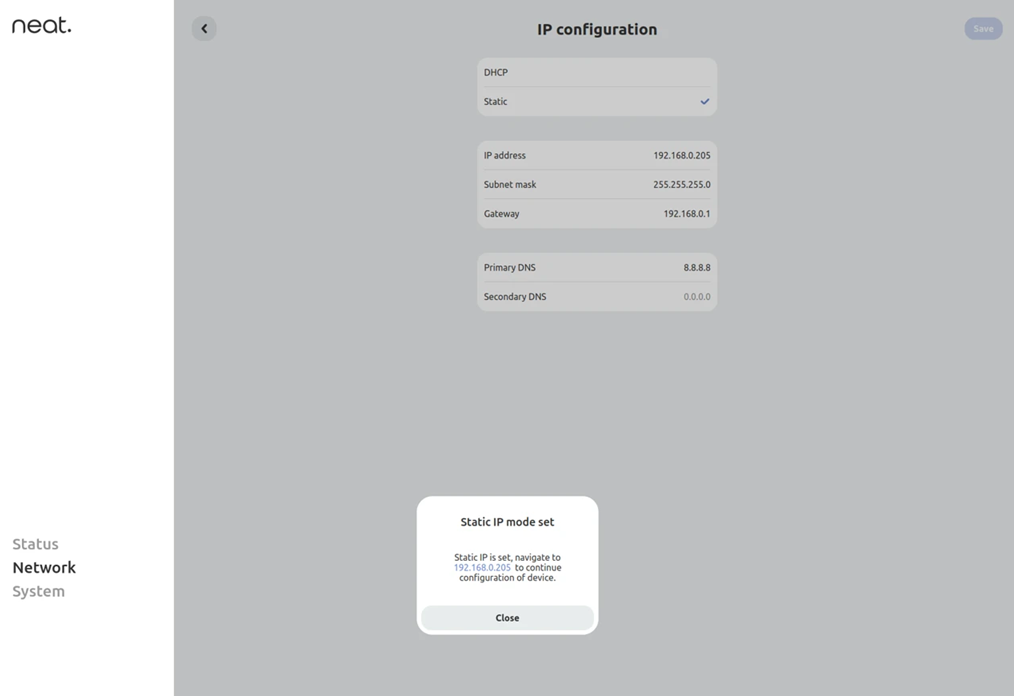
After setting Static IP
- At this point the Static IP configuration should immediately and automatically take effect and users will need to use the new IP address to log back into the remote web portal.
- Validation check: From a laptop on the same LAN ping the old IP (should timeout) and then the new Static IP for confirmation.
- The Static IP address changes should reflect in Pulse and also in the System settings on the Pad screen.